How to compile and run Java in Container
- 1. OpenJDK
- 2. Java EE and Jakarta EE
- 3. The javac Command
- 4. The java Command
- 5. Maven
- 6. Java in Container
- 7. Java programming lanuage
- References
1. OpenJDK
OpenJDK (Open Java Development Kit) is a free and open-source implementation of the Java Platform, Standard Edition (Java SE).[16]
The OpenJDK project produces a number of components: most importantly the virtual machine (HotSpot), the Java Class Library and the Java compiler (javac).[16]
HotSpot is a specific implementation of the JVM. It’s the most widely used JVM, developed and maintained by Oracle (and later by the OpenJDK community).
To build and run Java applications, a Java Compiler, Java Runtime Libraries, and a Virtual Machine are required that implement the Java Platform, Standard Edition (“Java SE”) specification.[17]
The OpenJDK is the open source reference implementation of the Java SE Specification, but it is only the source code. Binary distributions are provided by different vendors for a number of supported platforms. These distributions differ in licenses, commercial support, supported platforms, and update frequency.[17]
| ✅ Recommendation: Adoptium Eclipse Temurin OpenJDK builds are highly recommended.[17] |
Eclipse Temurin: ee-klips teh-muh-rin [ɪˈklɪps ˈtɛmərɪn]
Adoptium: uh-dop-tee-uhm [əˈdɒptiəm]
Note: The phonetic transcription is written using the International Phonetic Alphabet (IPA).
For Debian/Linux Bookworm, the OpenJDK 17 binary packages are built and distributed by the Debian (/ˈdɛbiən/) project itself. The Debian maintainers compile the OpenJDK source code and package it for the Debian distribution. This ensures that the binaries are properly integrated with the Debian package management system and conform to Debian’s policies and standards.
When you install the default-jdk or openjdk-17-jdk package on Debian Bookworm, you are getting the OpenJDK 17 binary that has been built and distributed by the Debian project.
$ apt show default-jdk
Package: default-jdk
Version: 2:1.17-74
Depends: default-jre (= 2:1.17-74), default-jdk-headless (= 2:1.17-74), openjdk-17-jdk
| Build | Organization | LTS | Permissive license | TCK tested | Built unmodified | Commercial support |
|---|---|---|---|---|---|---|
AdoptOpenJDK (moved to Eclipse Temurin in 2021) |
Yes |
Yes |
Yes |
Optional |
Optional (IBM) |
|
Amazon Corretto |
Amazon |
Yes |
Yes |
Yes |
No |
Optional (on AWS) |
Azul Zulu |
Azul Systems |
Yes |
Yes |
Yes |
No |
Optional |
BellSoft Liberica JDK |
BellSoft |
Yes |
Yes |
Yes |
No |
Optional |
Yes |
Yes |
Yes |
No |
Optional (Azul, IBM, Red Hat) |
||
Microsoft Build of OpenJDK |
Microsoft |
Yes |
Yes |
Yes |
No |
Optional (on Azure) |
Oracle GraalVM Enterprise Edition |
Oracle |
Yes |
No |
Yes |
No |
Yes |
Oracle Java SE |
Oracle |
Yes |
No |
Yes |
No |
Yes |
Oracle OpenJDK |
Oracle |
No |
Yes |
Yes |
No |
No |
|
Adoptium Eclipse Temurin
Eclipse Adoptium is a top-level project under the Eclipse Foundation, which provides resources and a professional governance model for open source software. The Adoptium Working Group consists of major companies and organizations that have a strategic interest in the Java technology, including Red Hat, IBM, Microsoft, Azul, and the iJUG. The former AdoptOpenJDK project has moved to Eclipse Adoptium.[17] The Adoptium OpenJDK builds are called Eclipse Temurin to distinguish the project from the builds. Eclipse Temurin builds are high-quality, vendor-neutral, and TCK-tested under a permissive license. Adoptium states, it will continue to build binaries for LTS releases as long as the corresponding upstream source is actively maintained. ✅ Recommendation: Adoptium Eclipse Temurin OpenJDK builds are highly recommended. |
curl -s "https://get.sdkman.io" | bash
|
|
On Windows, you can use the You can also find the location by opening your terminal and typing: You would use the In this command:
Here’s an example: Note: For creating hard links or junctions, you can use |
2. Java EE and Jakarta EE
Java EE (Java Enterprise Edition) and Jakarta EE are both frameworks for building enterprise-level applications in Java. They provide a set of specifications, APIs, and libraries for simplifying the development, deployment, and management of scalable, secure, and robust applications.
Java EE:
-
Java EE was developed by Sun Microsystems and later maintained by Oracle after its acquisition of Sun.
-
It is a widely used, standardized platform for creating server-side Java applications and web services.
-
Java EE provides a set of specifications and APIs for various services, such as servlets (/ˈsɜːvlɪts/), JavaServer Pages (JSP), Enterprise JavaBeans (EJB), Java Persistence API (JPA), Java Message Service (JMS), Java Transaction API (JTA), and many more.
-
Java EE has been the industry standard for building enterprise applications for many years, with numerous application servers implementing its specifications, such as GlassFish, WildFly, WebLogic, and WebSphere.
Jakarta EE:
-
In 2017, Oracle announced its intention to transfer the management of Java EE to the Eclipse Foundation, an open-source software foundation. As a result, Jakarta EE was born.
-
Jakarta EE is the evolution of Java EE, with the aim of fostering a more open and community-driven ecosystem for the development of enterprise Java applications.
-
The transition from Java EE to Jakarta EE involved renaming and rebranding, as well as re-licensing under the Eclipse Foundation’s intellectual property rules.
-
Jakarta EE is backward compatible with Java EE and continues to maintain the existing set of specifications and APIs, with plans for future innovation and enhancements.
-
Jakarta EE is supported by a diverse group of organizations, including Oracle, IBM, Red Hat, and many others, ensuring a strong future for the platform.
In summary, Java EE is the original, widely-used platform for building enterprise Java applications, while Jakarta EE is its successor under the Eclipse Foundation, aiming to foster a more open, community-driven, and innovative ecosystem. Both platforms provide a standardized set of specifications, APIs, and libraries for creating scalable, secure, and robust server-side applications and web services in Java.
Migrating from Java EE to Jakarta EE is generally straightforward, as Jakarta EE is designed to be backward compatible with Java EE. However, there are some steps and considerations to ensure a smooth migration:
-
Update dependencies: Replace Java EE dependencies in your project with their corresponding Jakarta EE counterparts.
For example, update the
javaxpackages to theirjakartaequivalents in your project’s dependency management (e.g., Maven or Gradle). You may also need to update the versions of these dependencies to the latest Jakarta EE compatible versions. -
Update package names: Starting from Jakarta EE 9, package names have been changed from
javax.*tojakarta.*.You’ll need to update the package names in your Java source code, XML configuration files, and any other places where the old package names are used. You can use tools like the Eclipse Transformer to help automate this process.
-
Update application server: Ensure that your application server supports Jakarta EE.
Most popular Java EE application servers, such as GlassFish, WildFly, OpenLiberty, and Payara, have corresponding Jakarta EE compatible versions. You may need to update the server version and configuration to be compatible with Jakarta EE.
-
Test your application: After updating dependencies, package names, and the application server, thoroughly test your application to ensure that it behaves as expected. Be sure to check for any issues or incompatibilities that may arise due to the migration.
-
Monitor deprecated features and future updates: Although Jakarta EE aims to maintain backward compatibility with Java EE, some features may be deprecated or removed in future releases. Keep an eye on Jakarta EE release notes and announcements to plan for any necessary updates or adjustments in your application.
By following these steps, you can successfully migrate your Java EE application to Jakarta EE and take advantage of the ongoing improvements and innovations in the Jakarta EE ecosystem.
With the transition from Java EE to Jakarta EE, the javax. packages have been replaced with jakarta. packages starting from Jakarta EE 9. This change was made due to legal and intellectual property reasons when Oracle transferred Java EE to the Eclipse Foundation.
The javax. packages will not be removed or deprecated immediately, but they will not receive new features or updates. The focus of future development, enhancements, and innovation will be on the jakarta. packages in the Jakarta EE ecosystem.
It’s important for projects and applications that are still using the javax. packages to consider migrating to the jakarta. packages in the long term. This will ensure that they can take advantage of the ongoing improvements and new features in Jakarta EE.
While the javax. packages might not be deprecated in the short term, it is recommended that new projects use the jakarta. packages to ensure compatibility with future Jakarta EE releases and benefit from the active development and support of the Jakarta EE community.
3. The javac Command
The javac command reads source files that contain module, package and type declarations written in the Java programming language, and compiles them into class files that run on the Java Virtual Machine. [1]
// Hello.java
public class Hello {
   public static void main(String[] args) {
      System.out.println("Hello Java!");
   }
}
// Complile with 'javac'
$ javac Hello.java
// Run with 'java'
$ java Hello
Hello Java!
// javac -d and java -cp
$ javac Hello.java -d target/classes/
$ java -cp target/classes/ Hello
Hello Java!4. The java Command
The java command starts a Java application. It does this by starting the Java Virtual Machine (JVM), loading the specified class, and calling that class’s main() method. The method must be declared public and static, it must not return any value, and it must accept a String array as a parameter. The method declaration has the following form:
public static void main(String[] args)In source-file mode, the java command can launch a class declared in a source file.
|
You can use the is equivalent to the command line: |
By default, the first argument that isn’t an option of the java command is the fully qualified name of the class to be called. If -jar is specified, then its argument is the name of the JAR file containing class and resource files for the application. The startup class must be indicated by the Main-Class manifest header in its manifest file.
Arguments after the class file name or the JAR file name are passed to the main() method.
-
To launch a single source-file program
-
Synopsis
java [options] source-file [args ...] -
java Hello.java$ java Hello.java Hello Java!
-
-
To launch a class file
-
Synopsis
java [options] mainclass [args ...] -
java Hello
$ javac Hello.java
$ java Hello
Hello Java!
-
-
To launch the main class in a JAR file
java [options] -jar jarfile [args ...]The jarfile argument is the name of a JAR file with a manifest that contains a line in the form
Main-Class:classnamethat defines the class with thepublic static void main(String[] args)method that serves as your application’s starting point.When you use
-jar, the specified JAR file is the source of all user classes, and other class path settings are ignored.Thejarcommandjar [OPTION ...] [ [--release VERSION] [-C dir] files] ...$ jar -cf foo.jar Hello.class $ java -cp foo.jar Hello Hello Java!$ java -jar foo.jar no main manifest attribute, in foo.jar $ jar --create --file buz.jar --main-class Hello Hello.class $ java -jar buz.jar Hello Java! $ jar xf buz.jar META-INF/ $ cat META-INF/MANIFEST.MF Manifest-Version: 1.0 Created-By: 11.0.12 (Debian) Main-Class: Hello
4.1. Overview of Java Options
The java command supports a wide range of options in the following categories: [2]
-
Standard Options:
Options guaranteed to be supported by all implementations of the Java Virtual Machine (JVM).
They’re used for common actions, such as checking the version of the JRE, setting the class path, enabling verbose output, and so on.
-
Extra Options:
General purpose options that are specific to the Java HotSpot Virtual Machine.
They aren’t guaranteed to be supported by all JVM implementations, and are subject to change. These options start with -X.
-
Advanced Options
The advanced options aren’t recommended for casual use. These are developer options used for tuning specific areas of the Java HotSpot Virtual Machine operation that often have specific system requirements and may require privileged access to system configuration parameters.
These options aren’t guaranteed to be supported by all JVM implementations and are subject to change. These options start with -XX.
-
Runtime Options:
Control the runtime behavior of the Java HotSpot VM.
-
JIT Compiler Options:
Control the dynamic just-in-time (JIT) compilation performed by the Java HotSpot VM.
-
Serviceability Options:
Enable gathering system information and performing extensive debugging.
-
Garbage Collection Options:
Control how garbage collection (GC) is performed by the Java HotSpot
Boolean -XX options are enabled using the plus sign ( -XX:+OptionName) and disabled using the minus sign (-XX:-OptionName). -
For options that require an argument, the argument may be
-
separated from the option name by a
space, acolon(:), or anequal sign(=), or -
the argument may
directly follow the option(the exact syntax differs for each option).
If you’re expected to specify the size in bytes, then you can use no suffix, or use the suffix k or K for kilobytes (KB), m or M for megabytes (MB), or g or G for gigabytes (GB).
For example, to set the size to 8 GB, you can specify either 8g, 8192m, 8388608k, or 8589934592 as the argument.
If you are expected to specify the percentage, then use a number from 0 to 1.
For example, specify
0.25for 25%.
4.2. Standard Options for Java
These are the most commonly used options supported by all implementations of the JVM.
To specify an argument for a long option, you can use either --name=value or --name value.
-
--class-path classpath, -classpath classpath, or -cp classpath
A semicolon (
;) separated list of directories, JAR archives, and ZIP archives to search for class files. Specifying classpath overrides any setting of the CLASSPATH environment variable.If the class path option isn’t used and classpath isn’t set, then the user class path consists of the current directory (
.).As a special convenience, a class path element that contains a base name of an asterisk (
*) is considered equivalent to specifying a list of all the files in the directory with the extension .jar or .JAR .A Java program can’t tell the difference between the two invocations.
For example, if the directory mydir contains a.jar and b.JAR, then the class path element mydir/* is expanded to A.jar:b.JAR, except that the order of JAR files is unspecified. All .jar files in the specified directory, even hidden ones, are included in the list.
A class path entry consisting of an asterisk (
*) expands to a list of all the jar files in the current directory.The CLASSPATH environment variable, where defined, is similarly expanded.
Any class path wildcard expansion that occurs before the Java VM is started.
Java programs never see wildcards that aren’t expanded except by querying the environment, such as by calling
System.getenv("CLASSPATH"). -
--list-modules
Lists the observable modules and then exits.
-
-d module_name or --describe-module module_name
Describes a specified module and then exits.
-
--dry-run
Creates the VM but doesn’t execute the main method.
This --dry-run option might be useful for validating the command-line options such as the module system configuration.
-
--validate-modules
Validates all modules and exit. This option is helpful for finding conflicts and other errors with modules on the module path.
-
-Dproperty=value
Sets a system property value.
The property variable is a string with no spaces that represents the name of the property. The value variable is a string that represents the value of the property.
If value is a string with spaces, then enclose it in quotation marks (for example -Dfoo="foo bar").
-
-verbose:class
Displays information about each loaded class.
-
-verbose:gc
Displays information about each garbage collection (GC) event.
-
-verbose:jni
Displays information about the use of native methods and other Java Native Interface (JNI) activity.
-
-verbose:module
Displays information about the modules in use.
-
-X
Prints the help on extra options to the error stream.
4.3. Extra Options for Java
The following java options are general purpose options that are specific to the Java HotSpot Virtual Machine.
-
-Xlog:option
Configure or enable logging with the Java Virtual Machine (JVM) unified logging framework.
-
-Xinternalversion
Displays more detailed JVM version information than the -version option, and then exits.
-
-Xmn size
Sets the initial and maximum size (in bytes) of the heap for the young generation (nursery) in the generational collectors.
Append the letter
korKto indicate kilobytes,morMto indicate megabytes, orgorGto indicate gigabytes.The young generation region of the heap is used for new objects.
-
GC is performed in this region more often than in other regions.
-
If the size for the young generation is too small, then a lot of minor garbage collections are performed.
-
If the size is too large, then only full garbage collections are performed, which can take a long time to complete.
-
It is recommended that you do not set the size for the young generation for the G1 collector, and keep the size for the young generation greater than 25% and less than 50% of the overall heap size for other collectors.
The following examples show how to set the initial and maximum size of young generation to 256 MB using various units:
-Xmn256m
-Xmn262144k
-Xmn268435456
Instead of the -Xmn option to set both the initial and maximum size of the heap for the young generation, you can use -XX:NewSize to set the initial size and -XX:MaxNewSize to set the maximum size.
-
-
-Xms size
Sets the minimum and initial size (in bytes) of the heap.
This value must be a multiple of 1024 and greater than 1 MB.
Append the letter
korKto indicate kilobytes,morMto indicate megabytes, orgorGto indicate gigabytes.The following examples show how to set the size of allocated memory to 6 MB using various units:
-Xms6291456
-Xms6144k
-Xms6m
Instead of the -Xms option to set both the minimum and initial size of the heap, you can use -XX:MinHeapSize to set the minimum size and -XX:InitialHeapSize to set the initial size.
If you don’t set this option, the initial size is set as the sum of the sizes allocated for the old generation and the young generation.
The initial size of the heap for the young generation can be set using the -Xmn option or the -XX:NewSize option.
-
-Xmx size
Specifies the maximum size (in bytes) of the heap.
This value must be a multiple of 1024 and greater than 2 MB.
Append the letter
korKto indicate kilobytes,morMto indicate megabytes, orgorGto indicate gigabytes.The default value is chosen at runtime based on system configuration.
For server deployments, -Xms and -Xmx are often set to the same value.
The following examples show how to set the maximum allowed size of allocated memory to 80 MB using various units:
-Xmx83886080
-Xmx81920k
-Xmx80m
The -Xmx option is equivalent to -XX:MaxHeapSize.
-
-XshowSettings
Shows all settings and then continues.
-
-XshowSettings:category
Shows settings and continues.
Possible category arguments for this option include the following:
-
all
Shows all categories of settings. This is the default value.
-
locale
Shows settings related to locale.
-
properties
Shows settings related to system properties.
-
vm
Shows the settings of the JVM.
-
system
Linux: Shows host system or container configuration and continues.
-
-
-Xss size
Sets the thread stack size (in bytes).
Append the letter
korKto indicate kilobytes,morMto indicate megabytes, orgorGto indicate gigabytes.The default value depends on the platform:
-
Linux/x64 (64-bit): 1024 KB
-
macOS (64-bit): 1024 KB
-
Windows: The default value depends on virtual memory
The following examples set the thread stack size to 1024 KB in different units:
-Xss1m
-Xss1024k
-Xss1048576
This option is similar to -XX:ThreadStackSize.
-
-
--source version
Sets the version of the source in source-file mode.
4.4. Advanced Options for Java
These java options can be used to enable other advanced options.
-
-XX:+UnlockDiagnosticVMOptions
Unlocks the options intended for diagnosing the JVM. By default, this option is disabled and diagnostic options aren’t available.
Command line options that are enabled with the use of this option are not supported. If you encounter issues while using any of these options, it is very likely that you will be required to reproduce the problem without using any of these unsupported options before Oracle Support can assist with an investigation. It is also possible that any of these options may be removed or their behavior changed without any warning.
-
-XX:+UnlockExperimentalVMOptions
Unlocks the options that provide experimental features in the JVM. By default, this option is disabled and experimental features aren’t available.
-
-XX:+PrintFlagsInitial
Print all the default values of all XX flags.
-
-XX:+PrintFlagsFinal
Print all the current values to all XX flags.
4.5. Advanced Runtime Options for Java
These java options control the runtime behavior of the Java HotSpot VM.
-
-XX:ActiveProcessorCount=x
Overrides the number of CPUs that the VM will use to calculate the size of thread pools it will use for various operations such as Garbage Collection and ForkJoinPool.
The VM normally determines the number of available processors from the operating system.
This flag can be useful for partitioning CPU resources when running multiple Java processes in docker containers.
This flag is honored even if -XX:-UseContainerSupport is not enabled.
-
-XX:MaxDirectMemorySize=size
Sets the maximum total size (in bytes) of the java.nio package, direct-buffer allocations.
Append the letter
korKto indicate kilobytes,morMto indicate megabytes, orgorGto indicate gigabytes.By default, the size is set to
0, meaning that the JVM chooses the size for NIO direct-buffer allocations automatically.The following examples illustrate how to set the NIO size to 1024 KB in different units:
-XX:MaxDirectMemorySize=1m -XX:MaxDirectMemorySize=1024k -XX:MaxDirectMemorySize=1048576 -
-XX:NativeMemoryTracking=mode
Specifies the mode for tracking JVM native memory usage.
Possible mode arguments for this option include the following:
-
off
Instructs not to track JVM native memory usage.
This is the default behavior if you don’t specify the -XX:NativeMemoryTracking option.
-
summary
Tracks memory usage only by JVM subsystems, such as Java heap, class, code, and thread.
-
detail
In addition to tracking memory usage by JVM subsystems, track memory usage by individual CallSite, individual virtual memory region and its committed regions.
-
-
-XX:OnError=string
Sets a custom command or a series of semicolon-separated commands to run when an irrecoverable error occurs.
If the string contains spaces, then it must be enclosed in quotation marks.
-
Linux and macOS:
The following example shows how the -XX:OnError option can be used to run the gcore command to create a core image, and start the gdb debugger to attach to the process in case of an irrecoverable error (the %p designates the current process identifier):
-XX:OnError="gcore %p;gdb -p %p" -
Windows:
The following example shows how the -XX:OnError option can be used to run the userdump.exe utility to obtain a crash dump in case of an irrecoverable error (the %p designates the current process identifier).
This example assumes that the path to the userdump.exe utility is specified in the PATH environment variable:
-XX:OnError="userdump.exe %p"
-
-
-XX:OnOutOfMemoryError=string
Sets a custom command or a series of semicolon-separated commands to run when an OutOfMemoryError exception is first thrown.
If the string contains spaces, then it must be enclosed in quotation marks.
For an example of a command string, see the description of the -XX:OnError option.
-
-XX:+PrintCommandLineFlags
Enables printing of ergonomically selected JVM flags that appeared on the command line.
It can be useful to know the ergonomic values set by the JVM, such as the heap space size and the selected garbage collector.
By default, this option is disabled and flags aren’t printed.
-
-XX:+PrintNMTStatistics
Enables printing of collected native memory tracking data at JVM exit when native memory tracking is enabled (see -XX:NativeMemoryTracking).
By default, this option is disabled and native memory tracking data isn’t printed.
-
-XX:ThreadStackSize=size
Sets the Java thread stack size (in kilobytes).
Use of a scaling suffix, such as k, results in the scaling of the kilobytes value so that -XX:ThreadStackSize=1k sets the Java thread stack size to 1024*1024 bytes or 1 megabyte.
The default value depends on the platform:
-
Linux/x64 (64-bit): 1024 KB
-
macOS (64-bit): 1024 KB
-
Windows: The default value depends on virtual memory
The following examples show how to set the thread stack size to 1 megabyte in different units:
-XX:ThreadStackSize=1k
-XX:ThreadStackSize=1024
This option is similar to -Xss.
-
-
-XX:-UseContainerSupport
The VM now provides automatic container detection support, which allows the VM to determine the amount of memory and number of processors that are available to a Java process running in docker containers.
It uses this information to allocate system resources.
This support is only available on Linux x64 platforms.
If supported, the default for this flag is true, and container support is enabled by default.
It can be disabled with -XX:-UseContainerSupport.
Unified Logging is available to help to diagnose issues related to this support.
Use -Xlog:os+container=trace for maximum logging of container information.
4.6. Advanced JIT Compiler Options for java
These java options control the dynamic just-in-time (JIT) compilation performed by the Java HotSpot VM.
-
-XX:InitialCodeCacheSize=size
Sets the initial code cache size (in bytes).
Append the letter
korKto indicate kilobytes,morMto indicate megabytes, orgorGto indicate gigabytes.The default value depends on the platform.
The initial code cache size shouldn’t be less than the system’s minimal memory page size.
The following example shows how to set the initial code cache size to 32 KB:
-XX:InitialCodeCacheSize=32k -
-XX:ReservedCodeCacheSize=size
Sets the maximum code cache size (in bytes) for JIT-compiled code.
Append the letter
korKto indicate kilobytes,morMto indicate megabytes, orgorGto indicate gigabytes.The default maximum code cache size is 240 MB; if you disable tiered compilation with the option -XX:-TieredCompilation, then the default size is 48 MB.
This option has a limit of 2 GB; otherwise, an error is generated.
The maximum code cache size shouldn’t be less than the initial code cache size; see the option -XX:InitialCodeCacheSize.
-
-XX:-TieredCompilation
Disables the use of tiered compilation.
By default, this option is enabled.
4.7. Advanced Garbage Collection Options for Java
These java options control how garbage collection (GC) is performed by the Java HotSpot VM.
-
-XX:ConcGCThreads=threads
Sets the number of threads used for concurrent GC.
Sets threads to approximately 1/4 of the number of parallel garbage collection threads.
The default value depends on the number of CPUs available to the JVM.
For example, to set the number of threads for concurrent GC to 2, specify the following option:
-XX:ConcGCThreads=2 -
-XX:+DisableExplicitGC
Enables the option that disables processing of calls to the System.gc() method.
This option is disabled by default, meaning that calls to System.gc() are processed.
If processing of calls to System.gc() is disabled, then the JVM still performs GC when necessary.
-
-XX:+ExplicitGCInvokesConcurrent
Enables invoking of concurrent GC by using the System.gc() request.
This option is disabled by default and can be enabled only with the -XX:+UseG1GC option.
-
-XX:InitialHeapSize=size
Sets the initial size (in bytes) of the memory allocation pool.
This value must be either 0, or a multiple of 1024 and greater than 1 MB.
Append the letter k or K to indicate kilobytes, m or M to indicate megabytes, or g or G to indicate gigabytes.
The default value is selected at run time based on the system configuration.
The following examples show how to set the size of allocated memory to 6 MB using various units:
-XX:InitialHeapSize=6291456
-XX:InitialHeapSize=6144k
-XX:InitialHeapSize=6m
If you set this option to 0, then the initial size is set as the sum of the sizes allocated for the old generation and the young generation.
The size of the heap for the young generation can be set using the -XX:NewSize option.
-
-XX:InitialRAMPercentage=percent
Sets the initial amount of memory that the JVM will use for the Java heap before applying ergonomics heuristics as a percentage of the maximum amount determined as described in the -XX:MaxRAM option.
The default value is 1.5625 percent.
The following example shows how to set the percentage of the initial amount of memory used for the Java heap:
-XX:InitialRAMPercentage=5 -
-XX:MaxGCPauseMillis=time
Sets a target for the maximum GC pause time (in milliseconds).
This is a soft goal, and the JVM will make its best effort to achieve it.
The specified value doesn’t adapt to your heap size.
By default, for G1 the maximum pause time target is 200 milliseconds.
The other generational collectors do not use a pause time goal by default.
The following example shows how to set the maximum target pause time to 500 ms:
-XX:MaxGCPauseMillis=500 -
-XX:MaxHeapSize=size
Sets the maximum size (in byes) of the memory allocation pool.
This value must be a multiple of 1024 and greater than 2 MB.
Append the letter
korKto indicate kilobytes,morMto indicate megabytes, orgorGto indicate gigabytes.The default value is selected at run time based on the system configuration.
For server deployments, the options -XX:InitialHeapSize and -XX:MaxHeapSize are often set to the same value.
The following examples show how to set the maximum allowed size of allocated memory to 80 MB using various units:
-XX:MaxHeapSize=83886080
-XX:MaxHeapSize=81920k
-XX:MaxHeapSize=80m
The -XX:MaxHeapSize option is equivalent to -Xmx.
-
-XX:MaxMetaspaceSize=size
Sets the maximum amount of native memory that can be allocated for class metadata.
By default, the size isn’t limited.
The amount of metadata for an application depends on the application itself, other running applications, and the amount of memory available on the system.
The following example shows how to set the maximum class metadata size to 256 MB:
-XX:MaxMetaspaceSize=256m -
-XX:MaxNewSize=size
Sets the maximum size (in bytes) of the heap for the young generation (nursery).
The default value is set ergonomically.
-
-XX:MaxRAM=size
Sets the maximum amount of memory that the JVM may use for the Java heap before applying ergonomics heuristics.
The default value is the maximum amount of available memory to the JVM process or 128 GB, whichever is lower.
The maximum amount of available memory to the JVM process is the minimum of the machine’s physical memory and any constraints set by the environment (e.g. container).
Specifying this option disables automatic use of compressed oops if the combined result of this and other options influencing the maximum amount of memory is larger than the range of memory addressable by compressed oops.
The following example shows how to set the maximum amount of available memory for sizing the Java heap to 2 GB:
-XX:MaxRAM=2G -
-XX:MaxRAMPercentage=percent
Sets the maximum amount of memory that the JVM may use for the Java heap before applying ergonomics heuristics as a percentage of the maximum amount determined as described in the -XX:MaxRAM option.
The default value is 25 percent.
Specifying this option disables automatic use of compressed oops if the combined result of this and other options influencing the maximum amount of memory is larger than the range of memory addressable by compressed oops. See -XX:UseCompressedOops for further information about compressed oops.
The following example shows how to set the percentage of the maximum amount of memory used for the Java heap:
-XX:MaxRAMPercentage=75 -
-XX:MinRAMPercentage=percent
Sets the maximum amount of memory that the JVM may use for the Java heap before applying ergonomics heuristics as a percentage of the maximum amount determined as described in the -XX:MaxRAM option for small heaps.
A small heap is a heap of approximately 125 MB.
The default value is 50 percent.
The following example shows how to set the percentage of the maximum amount of memory used for the Java heap for small heaps:
-XX:MinRAMPercentage=75 -
-XX:MetaspaceSize=size
Sets the size of the allocated class metadata space that triggers a garbage collection the first time it’s exceeded. This threshold for a garbage collection is increased or decreased depending on the amount of metadata used. The default size depends on the platform.
-
-XX:MinHeapSize=size
Sets the minimum size (in bytes) of the memory allocation pool. This value must be either 0, or a multiple of 1024 and greater than 1 MB. Append the letter k or K to indicate kilobytes, m or M to indicate megabytes, or g or G to indicate gigabytes. The default value is selected at run time based on the system configuration.
The following examples show how to set the mimimum size of allocated memory to 6 MB using various units:
-XX:MinHeapSize=6291456
-XX:MinHeapSize=6144k
-XX:MinHeapSize=6m
If you set this option to 0, then the minimum size is set to the same value as the initial size.
-
-XX:NewSize=size
Sets the initial size (in bytes) of the heap for the young generation (nursery).
Append the letter
korKto indicate kilobytes,morMto indicate megabytes, orgorGto indicate gigabytes.The young generation region of the heap is used for new objects.
-
GC is performed in this region more often than in other regions.
-
If the size for the young generation is too low, then a large number of minor GCs are performed.
-
If the size is too high, then only full GCs are performed, which can take a long time to complete.
-
It is recommended that you keep the size for the young generation greater than 25% and less than 50% of the overall heap size.
The following examples show how to set the initial size of the young generation to 256 MB using various units:
-XX:NewSize=256m
-XX:NewSize=262144k
-XX:NewSize=268435456
The -XX:NewSize option is equivalent to -Xmn.
-
-
-XX:+UseG1GC
Enables the use of the garbage-first (G1) garbage collector.
It’s a server-style garbage collector, targeted for multiprocessor machines with a large amount of RAM.
This option meets GC pause time goals with high probability, while maintaining good throughput.
The G1 collector is recommended for applications requiring large heaps (sizes of around 6 GB or larger) with limited GC latency requirements (a stable and predictable pause time below 0.5 seconds).
By default, this option is enabled and G1 is used as the default garbage collector.
4.8. Removed Java Options
These java options have been removed in JDK 17 and using them results in an error of:
Unrecognized VM option option-name-
-XX:MaxPermSize=size
Sets the maximum permanent generation space size (in bytes).
This option was deprecated in JDK 8 and superseded by the -XX:MaxMetaspaceSize option.
-
-XX:PermSize=size
Sets the space (in bytes) allocated to the permanent generation that triggers a garbage collection if it’s exceeded.
This option was deprecated in JDK 8 and superseded by the -XX:MetaspaceSize option.
5. Maven
Apache Maven is a software project management and comprehension tool based on the concept of a project object model (POM). [4]
|
Maven Wrapper
In summary, the main differences between
In Spring Boot projects, it’s recommended to use |
5.1. Settings XML
The settings element in the settings.xml file contains elements used to define values which configure Maven execution in various ways, and the settings.xml file may live: [8]
-
The Maven install:
${maven.home}/conf/settings.xml -
A user’s install:
${user.home}/.m2/settings.xml
The former settings.xml are also called global settings, the latter settings.xml are referred to as user settings. If both files exists, their contents gets merged, with the user-specific settings.xml being dominant.
If you need to create user-specific settings from scratch, it’s easiest to copy the global settings from your Maven installation to your ${user.home}/.m2 directory. Maven’s default settings.xml is a template with comments and examples so you can quickly tweak it to match your needs.
|
Here is an overview of the top elements under settings:
<settings xmlns="http://maven.apache.org/SETTINGS/1.0.0" xmlns:xsi="http://www.w3.org/2001/XMLSchema-instance"
  xsi:schemaLocation="http://maven.apache.org/SETTINGS/1.0.0 https://maven.apache.org/xsd/settings-1.0.0.xsd">
  <localRepository/>
  <interactiveMode/>
  <offline/>
  <pluginGroups/>
  <servers/>
  <mirrors/>
  <proxies/>
  <profiles/>
  <activeProfiles/>
</settings>
5.2. The Build Lifecycle
Maven is based around the central concept of a build lifecycle.
There are three built-in build lifecycles:
-
The default lifecycle handles your project deployment,
-
the clean lifecycle handles project cleaning,
-
while the site lifecycle handles the creation of your project’s web site.
5.2.1. A Build Lifecycle is Made Up of Phases
Each of these build lifecycles is defined by a different list of build phases, wherein a build phase represents a stage in the lifecycle.
For example, the default lifecycle comprises of the following phases:
-
validate
-
validate the project is correct and all necessary information is available
-
-
compile
-
compile the source code of the project
-
-
test
-
test the compiled source code using a suitable unit testing framework. These tests should not require the code be packaged or deployed
-
-
package
-
take the compiled code and package it in its distributable format, such as a JAR.
-
-
verify
-
run any checks on results of integration tests to ensure quality criteria are met
-
-
install
-
install the package into the local repository, for use as a dependency in other projects locally
-
-
deploy
-
done in the build environment, copies the final package to the remote repository for sharing with other developers and projects.
-
These lifecycle phases (plus the other lifecycle phases not shown here) are executed sequentially to complete the default lifecycle.
Given the lifecycle phases above, this means that when the default lifecycle is used, Maven will first
-
validate the project,
-
then will try to compile the sources,
-
run those against the tests,
-
package the binaries (e.g. jar),
-
run integration tests against that package,
-
verify the integration tests,
-
install the verified package to the local repository,
-
then deploy the installed package to a remote repository.
5.2.2. A Build Phase is Made Up of Plugin Goals
However, even though a build phase is responsible for a specific step in the build lifecycle, the manner in which it carries out those responsibilities may vary. And this is done by declaring the plugin goals bound to those build phases.
-
A plugin goal represents a specific task (finer than a build phase) which contributes to the building and managing of a project. It may be bound to zero or more build phases.
-
A goal not bound to any build phase could be executed outside of the build lifecycle by direct invocation.
-
The order of execution depends on the order in which the goal(s) and the build phase(s) are invoked.
For example, consider the command below. The clean and package arguments are build phases, while the dependency:copy-dependencies is a goal (of a plugin).
mvn clean dependency:copy-dependencies packageIf this were to be executed, the clean phase will be executed first (meaning it will run all preceding phases of the clean lifecycle, plus the clean phase itself), and then the dependency:copy-dependencies goal, before finally executing the package phase (and all its preceding build phases of the default lifecycle).
-
Moreover, if a goal is bound to one or more build phases, that goal will be called in all those phases.
-
Furthermore, a build phase can also have zero or more goals bound to it.
-
If a build phase has no goals bound to it, that build phase will not execute.
-
But if it has one or more goals bound to it, it will execute all those goals.
-
5.2.3. Setting Up Your Project to Use the Build Lifecycle
The build lifecycle is simple enough to use, but when you are constructing a Maven build for a project, how do you go about assigning tasks to each of those build phases?
-
Packaging
-
Each packaging contains a list of goals to bind to a particular phase.
-
Some of the valid packaging values are jar, war, ear and pom.
-
If no packaging value has been specified, it will default to jar.
-
-
Plugins
-
Plugins are artifacts that provide goals to Maven.
-
A plugin may have one or more goals wherein each goal represents a capability of that plugin.
For example, the Compiler plugin has two goals: compile and testCompile.
The former compiles the source code of your main code, while the latter compiles the source code of your test code.
The goals that are configured will be added to the goals already bound to the lifecycle from the packaging selected.
-
If more than one goal is bound to a particular phase, the order used is that those from the packaging are executed first, followed by those configured in the POM.
Note that you can use the <executions> element to gain more control over the order of particular goals.
-
5.3. POM
-
It is an XML file that contains information about the project and configuration details used by Maven to build the project.
-
It contains default values for most projects.
Examples for this is the build directory, which is
target; the source directory, which issrc/main/java; the test source directory, which issrc/test/java; and so on.When executing a task or goal, Maven looks for the POM in the current directory. It reads the POM, gets the needed configuration information, then executes the goal.
-
Some of the configuration that can be specified in the POM are the project dependencies, the plugins or goals that can be executed, the build profiles, and so on.
-
Other information such as the project version, description, developers, mailing lists and such can also be specified.
5.3.1. Super POM
The Super POM is Maven’s default POM. All POMs extend the Super POM unless explicitly set, meaning the configuration specified in the Super POM is inherited by the POMs you created for your projects.
5.3.2. Minimal POM
The minimum requirement for a POM are the following:
-
projectroot -
modelVersion- should be set to 4.0.0 -
groupId- the id of the project’s group.groupId uniquely identifies your project across all projects. A group ID should follow Java’s package name rules. This means it starts with a reversed domain name you control. For example,
org.apache.maven,org.apache.commons.Maven does not enforce this rule. There are many legacy projects that do not follow this convention and instead use single word group IDs. However, it will be difficult to get a new single word group ID approved for inclusion in the Maven Central repository.
You can create as many subgroups as you want. A good way to determine the granularity of the
groupIdis to use the project structure. That is, if the current project is a multiple module project, it should append a new identifier to the parent’s groupId. For example,org.apache.maven,org.apache.maven.plugins,org.apache.maven.reporting. -
artifactId- the id of the artifact (project)artifactId is the name of the jar without version. If you created it, then you can choose whatever name you want with lowercase letters and no strange symbols. If it’s a third party jar, you have to take the name of the jar as it’s distributed. eg.
maven,commons-math -
version- the version of the artifact under the specified groupversion if you distribute it, then you can choose any typical version with numbers and dots (1.0, 1.1, 1.0.1, …).
Don’t use dates as they are usually associated with SNAPSHOT (nightly) builds. If it’s a third party artifact, you have to use their version number whatever it is, and as strange as it can look. For example,
2.0,2.0.1,1.3.1.
Here’s an example:
<project>
  <modelVersion>4.0.0</modelVersion>

  <groupId>com.mycompany.app</groupId>
  <artifactId>my-app</artifactId>
  <version>1</version>
</project>
5.3.3. Project Inheritance vs Project Aggregation (or Multi-Module)
One powerful addition that Maven brings to build management is the concept of project inheritance.
<project>
  <modelVersion>4.0.0</modelVersion>

  <groupId>org.codehaus.mojo</groupId>
  <artifactId>my-parent</artifactId>
  <version>2.0</version>
  <packaging>pom</packaging>
</project>
The packaging type required to be pom for parent and aggregation (multi-module) projects. Most elements from the parent POM are inherited by its children, which are not inherited include: artifactId, name, prerequisites.
<project>
  <modelVersion>4.0.0</modelVersion>

  <parent>
    <groupId>org.codehaus.mojo</groupId>
    <artifactId>my-parent</artifactId>
    <version>2.0</version>
    <relativePath>../my-parent</relativePath>
  </parent>

  <artifactId>my-project</artifactId>
</project>
Notice the relativePath element. It is not required, but may be used as a signifier to Maven to first search the path given for this project’s parent, before searching the local and then remote repositories.
|
A project with modules is known as a multi-module, or aggregator project. Modules are projects that this POM lists, and are executed as a group. A pom packaged project may aggregate the build of a set of projects by listing them as modules, which are relative paths to the directories or the POM files of those projects.
<project>
  <modelVersion>4.0.0</modelVersion>

  <groupId>org.codehaus.mojo</groupId>
  <artifactId>my-parent</artifactId>
  <version>2.0</version>
  <packaging>pom</packaging>

  <modules>
    <module>my-project</module>
    <module>another-project</module>
    <module>third-project/pom-example.xml</module>
  </modules>
</project>
You do not need to consider the inter-module dependencies yourself when listing the modules; i.e. the ordering of the modules given by the POM is not important. Maven will topologically sort the modules such that dependencies are always build before dependent modules.
|
A final note on Inheritance v. Aggregation
Inheritance and aggregation create a nice dynamic to control builds through a single, high-level POM. You often see projects that are both parents and aggregators.
For example, the entire Maven core runs through a single base POM However, an aggregator project and a parent project are both POM projects, they are not one and the same and should not be confused. A POM project may be inherited from - but does not necessarily have - any modules that it aggregates. Conversely, a POM project may aggregate projects that do not inherit from it. |
5.4. Standard Directory Layout
Having a common directory layout allows users familiar with one Maven project to immediately feel at home in another Maven project. The advantages are analogous to adopting a site-wide look-and-feel.
The next section documents the directory layout expected by Maven and the directory layout created by Maven. Try to conform to this structure as much as possible. However, if you can’t, these settings can be overridden via the project descriptor.
src/main/java |
Application/Library sources |
src/main/resources |
Application/Library resources |
src/main/filters |
Resource filter files |
src/main/webapp |
Web application sources |
src/test/java |
Test sources |
src/test/resources |
Test resources |
src/test/filters |
Test resource filter files |
src/it |
Integration Tests (primarily for plugins) |
src/assembly |
Assembly descriptors |
src/site |
Site |
LICENSE.txt |
Project’s license |
NOTICE.txt |
Notices and attributions required by libraries that the project depends on |
README.txt |
Project’s readme |
5.5. Dependency management
Maven avoids the need to discover and specify the libraries that your own dependencies require by including transitive dependencies automatically. In general, all dependencies of those projects are used in your project, as are any that the project inherits from its parents, or from its dependencies, and so on. [21]
-
Dependency mediation - this determines what version of an artifact will be chosen when multiple versions are encountered as dependencies.
Maven picks the "nearest definition". That is, it uses the version of the closest dependency to your project in the tree of dependencies. You can always guarantee a version by declaring it explicitly in your project’s POM. Note that if two dependency versions are at the same depth in the dependency tree, the first declaration wins.
-
Dependency management - this allows project authors to directly specify the versions of artifacts to be used when they are encountered in transitive dependencies or in dependencies where no version has been specified.
-
Dependency scope - this allows you to only include dependencies appropriate for the current stage of the build.
Dependency scope is used to limit the transitivity of a dependency and to determine when a dependency is included in a classpath. There are 6 scopes: compile, provided, runtime, test, system and import.
-
Excluded dependencies - If project X depends on project Y, and project Y depends on project Z, the owner of project X can explicitly exclude project Z as a dependency, using the "exclusion" element.
-
Optional dependencies - If project Y depends on project Z, the owner of project Y can mark project Z as an optional dependency, using the "optional" element. When project X depends on project Y, X will depend only on Y and not on Y’s optional dependency Z. The owner of project X may then explicitly add a dependency on Z, at her option. (It may be helpful to think of optional dependencies as "excluded by default.")
Maven also provides dependency:analyze plugin goal for analyzing the dependencies: it helps making this best practice more achievable.
|
> What’s the dependencyManagement? * In Maven, the In the In the example above, the version of "my-library" will be managed by the parent POM, ensuring consistency across modules, but "my-library" will only be included in specific modules that call it in their This allows you to control versions from a central place. Additionally, if you need to update or change the versions, you only need to do it in one place rather than going through multiple POM files. It’s a very effective way of managing and controlling what gets included in your build. |
|
> What’s the import scope? * The The purpose of the For instance, consider the following use of In this case, |
5.6. Repositories
A repository in Maven holds build artifacts and dependencies of varying types.
There are exactly two types of repositories: local and remote:
-
the local repository is a directory on the computer where Maven runs. It caches remote downloads and contains temporary build artifacts that you have not yet released.
-
remote repositories refer to any other type of repository, accessed by a variety of protocols such as
file://andhttps://.These repositories might be a truly remote repository set up by a third party to provide their artifacts for downloading (for example, repo.maven.apache.org). Other "remote" repositories may be internal repositories set up on a file or HTTP server within your company, used to share private artifacts between development teams and for releases.
Local and remote repositories are structured the same way so that scripts can run on either side, or they can be synced for offline use. The layout of the repositories is completely transparent to the Maven user, however.
5.6.1. Setting up Multiple Repositories
There are two different ways that you can specify the use of multiple repositories. The first way is to specify in a POM which repositories you want to use. That is supported both inside and outside of build profiles:
<project>
...
  <repositories>
    <repository>
      <id>my-repo1</id>
      <name>your custom repo</name>
      <url>http://jarsm2.dyndns.dk</url>
    </repository>
    <repository>
      <id>my-repo2</id>
      <name>your custom repo</name>
      <url>http://jarsm2.dyndns.dk</url>
    </repository>
  </repositories>
...
</project>| NOTE: You will also get the standard set of repositories as defined in the Super POM. |
The other way you can specify multiple repositories is by creating a profile in the ${user.home}/.m2/settings.xml or ${maven.home}/conf/settings.xml file like the following:
<settings>
 ...
 <profiles>
   ...
   <profile>
     <id>myprofile</id>
     <repositories>
       <repository>
         <id>my-repo2</id>
         <name>your custom repo</name>
         <url>http://jarsm2.dyndns.dk</url>
       </repository>
     </repositories>
   </profile>
   ...
 </profiles>

 <activeProfiles>
   <activeProfile>myprofile</activeProfile>
 </activeProfiles>
 ...
</settings>
If you specify repositories in profiles you must remember to activate that particular profile! As you can see above we do this by registering a profile to be active in the activeProfiles element.
You could also activate this profile on the command like by executing the following command:
mvn -Pmyprofile ...In fact the -P option will take a CSV list of profiles to activate if you wish to activate multiple profiles simultaneously.
5.6.2. Repository Order
Remote repository URLs are queried in the following order for artifacts until one returns a valid result:
-
effective settings:
-
Global
settings.xml -
User
settings.xml
-
-
local effective build POM:
-
Local
pom.xml -
Parent POMs, recursively
-
Super POM
-
-
effective POMs from dependency path to the artifact.
For each of these locations, the repositories within the profiles are queried first in the order outlined at Introduction to build profiles.
Before downloading from a repository, mirrors configuration is applied.
Effective settings and local build POM, with profile taken into account, can easily be reviewed to see their repositories order with mvn help:effective-settings and mvn help:effective-pom -Dverbose.
5.6.3. Using Mirrors for Repositories
With Repositories you specify from which locations you want to download certain artifacts, such as dependencies and maven-plugins. Repositories can be declared inside a project, which means that if you have your own custom repositories, those sharing your project easily get the right settings out of the box. However, you may want to use an alternative mirror for a particular repository without changing the project files.
Some reasons to use a mirror are:
-
There is a synchronized mirror on the internet that is geographically closer and faster
-
You want to replace a particular repository with your own internal repository which you have greater control over
-
You want to run a repository manager to provide a local cache to a mirror and need to use its URL instead
To configure a mirror of a given repository, you provide it in your settings file (${user.home}/.m2/settings.xml), giving the new repository its own id and url, and specify the mirrorOf setting that is the ID of the repository you are using a mirror of.
For example, the ID of the main Maven Central repository included by default is central, so to use the different mirror instance, you would configure the following:
<settings>
  ...
  <mirrors>
    <mirror>
      <id>other-mirror</id>
      <name>Other Mirror Repository</name>
      <url>https://other-mirror.repo.other-company.com/maven2</url>
      <mirrorOf>central</mirrorOf>
    </mirror>
  </mirrors>
  ...
</settings>
Note that there can be at most one mirror for a given repository. In other words, you cannot map a single repository to a group of mirrors that all define the same <mirrorOf> value. Maven will not aggregate the mirrors but simply picks the first match. If you want to provide a combined view of several repositories, use a repository manager instead.
The settings descriptor documentation can be found on the Maven Local Settings Model Website.
Note: The official Maven repository is at https://repo.maven.apache.org/maven2 hosted by the Sonatype Company and is distributed worldwide via CDN.
5.6.4. Advanced Mirror Specification
A single mirror can handle multiple repositories. This is typically used in conjunction with a repository manager, that gives easy centralised configuration of the list of repositories behind.
The syntax:
-
*matches all repo ids. -
external:*matches all repositories except those using localhost or file based repositories. This is used when you want to exclude redirecting repositories that are defined for Integration Testing. -
since Maven 3.8.0,
external:http:*matches all repositories using HTTP except those using localhost. -
multiple repositories may be specified using a comma as the delimiter
-
an exclamation mark may be used in conjunction with one of the above wildcards to exclude a repository id
Be careful not to include extra whitespace around identifiers or wildcards in comma separated lists. For example, a mirror with <mirrorOf> set to !repo1, * will not mirror anything while !repo1,* will mirror everything but repo1.
The position of wildcards within a comma separated list of repository identifiers is not important as the wildcards defer to further processing and explicit includes or excludes stop the processing, overruling any wildcard match.
When you use the advanced syntax and configure multiple mirrors, the declaration order matters.
-
When Maven looks for a mirror of some repository, it first checks for a mirror whose
<mirrorOf>exactly matches the repository identifier. -
If no direct match is found, Maven picks the first mirror declaration that matches according to the rules above (if any).
-
Hence, you may influence match order by changing the order of the definitions in the
settings.xmlExamples:
-
*= everything -
external:*= everything not on the localhost and not file based. -
repo,repo1= repo or repo1 -
*,!repo1= everything except repo1
-
|
Release Notes – Maven 3.8.1: Possible Man-In-The-Middle-Attack due to custom repositories using HTTP
More and more repositories use HTTPS nowadays, but this hasn’t always been the case. This means that Maven Central contains POMs with custom repositories that refer to a URL over HTTP. This makes downloads via such repository a target for a MITM attack. At the same time, developers are probably not aware that for some downloads an insecure URL is being used. Because uploaded POMs to Maven Central are immutable, a change for Maven was required. To solve this, we extended the mirror configuration with |
5.7. Configuring Plug-ins
-
Build plugins are executed during the build and configured in the
<build/>element. -
Reporting plugins are executed during the site generation and configured in the
<reporting/>element.
All plugins should have minimal required information: groupId, artifactId and version.
Maven plugins (build and reporting) are configured by specifying a <configuration> element where the child elements of the <configuration> element are mapped to fields, or setters, inside your Mojo. [12]
Remember that a plug-in consists of one or more Mojos where a Mojo maps to a goal.
For example, you have a Mojo that performs a query against a particular URL, with a specified timeout and list of options. The Mojo might look like the following:
/**
 * @goal query
 */
public class MyQueryMojo extends AbstractMojo {
    @Parameter(property = "query.url", required = true)
    private String url;

    @Parameter(property = "timeout", required = false, defaultValue = "50")
    private int timeout;

    @Parameter(property = "options")
    private String[] options;

    public void execute() throws MojoExecutionException {
        // ...
    }
}
To configure the Mojo from your POM with the desired URL, timeout and options you might have something like the following:
<project>
  ...
  <build>
    <plugins>
      <plugin>
        <artifactId>maven-myquery-plugin</artifactId>
        <version>1.0</version>
        <configuration>
          <url>http://www.foobar.com/query</url>
          <timeout>10</timeout>
          <options>
            <option>one</option>
            <option>two</option>
            <option>three</option>
          </options>
        </configuration>
      </plugin>
    </plugins>
  </build>
    ...
</project>
The elements in the configuration match the names of the fields in the Mojo.
For Mojos that are intended to be executed directly from the CLI, their parameters usually provide a means to be configured via system properties instead of a <configuration> section in the POM.
The plugin documentation for those parameters will list an expression that denotes the system properties for the configuration.
In the Mojo above, the parameter url is associated with the expression ${query.url}, meaning its value can be specified by the system property query.url as shown below:
mvn myquery:query -Dquery.url=http://maven.apache.orgHelp Goal
Most Maven plugins have a help goal that prints a description of the plugin and its parameters and types. For instance, to see help for the javadoc goal, type:
mvn javadoc:help -Ddetail -Dgoal=javadocConfiguring Parameters
-
Mapping Simple Objects
<configuration> <myString>a string</myString> <myBoolean>true</myBoolean> <myInteger>10</myInteger> <myDouble>1.0</myDouble> <myFile>c:\temp</myFile> <myURL>http://maven.apache.org</myURL> </configuration> -
Mapping Complex Objects
<configuration>
  <person>
    <firstName>Jason</firstName>
    <lastName>van Zyl</lastName>
  </person>
</configuration>
<configuration> <person implementation="com.mycompany.mojo.query.SuperPerson"> <firstName>Jason</firstName> <lastName>van Zyl</lastName> </person> </configuration> -
Mapping Collections
-
Mapping Lists
public class MyAnimalMojo extends AbstractMojo {
    @Parameter(property = "animals")
    private List animals;

    public void execute() throws MojoExecutionException {
        ...
    }
}
<configuration> <animals> <animal>cat</animal> <animal>dog</animal> <animal>aardvark</animal> </animals> </configuration> -
Mapping Properties
    @Parameter(property = "myProperties")
    private Properties myProperties
<configuration> <myProperties> <property> <name>propertyName1</name> <value>propertyValue1</value> </property> <property> <name>propertyName2</name> <value>propertyValue2</value> </property> </myProperties> </configuration>
-
Configuring Build Plugins
-
Using the
<executions>Tag<build> <plugins> <plugin> <artifactId>maven-myquery-plugin</artifactId> <version>1.0</version> <executions> <execution> <id>execution1</id> <phase>test</phase> <configuration> ... </configuration> <goals> <goal>query</goal> </goals> </execution> <execution> <id>execution2</id> <configuration> ... </configuration> <goals> <goal>query</goal> </goals> </execution> </executions> </plugin> </plugins> </build>-
The first execution with id "execution1" binds this configuration to the test phase.
-
The second execution does not have a <phase> tag, have a default phase binding.
-
If the goal has a default phase binding then it will execute in that phase.
-
But if the goal is not bound to any lifecycle phase then it simply won’t be executed during the build lifecycle.
Note that while execution id’s have to be unique among all executions of a single plugin within a POM, they don’t have to be unique across an inheritance hierarchy of POMs.
Executions of the same id from different POMs are merged.
The same applies to executions that are defined by profiles.
-
-
Using the
<dependencies>TagYou could configure the dependencies of the Build plugins, commonly to use a more recent dependency version.
For instance, the Maven Antrun Plugin version 1.2 uses Ant version 1.6.5, if you want to use the latest Ant version when running this plugin, you need to add <dependencies> element like the following:
<plugin> <groupId>org.apache.maven.plugins</groupId> <artifactId>maven-antrun-plugin</artifactId> <version>1.2</version> ... <dependencies> <dependency> <groupId>org.apache.ant</groupId> <artifactId>ant</artifactId> <version>1.7.1</version> </dependency> <dependency> <groupId>org.apache.ant</groupId> <artifactId>ant-launcher</artifactId> <version>1.7.1</version> </dependency> </dependencies> </plugin> -
Using the
<inherited>Tag In Build Plugins<plugin> <groupId>org.apache.maven.plugins</groupId> <artifactId>maven-antrun-plugin</artifactId> <version>1.2</version> <inherited>false</inherited> ... </plugin>
5.8. Maven Help Plugin
-
The help:active-profiles Goal[13]
The active-profiles goal is used to discover which profiles have been applied to the projects currently being built.
For each project in the build session, it will output a list of profiles which have been applied to that project, along with the source of the profile (POM, settings.xml or profiles.xml).
You can execute this goal using the following command:
# mvn help:active-profilesyou could also use the output parameter to redirect output to a file. -
The help:all-profiles Goal
The all-profiles goal is used to discover all available profiles under the current project.
You can execute this goal using the following command:
# mvn help:all-profilesyou could also use the output parameter to redirect output to a file. -
The help:describe Goal
The describe goal is used to discover information about Maven plugins.
Given either a plugin or a groupId, an artifactId and optionally a version, the goal will lookup that plugin and output details about it.
If the user also specifies which goal to describe, the describe goal will limit output to the details of that goal, including parameters.
You can execute this goal using the following command:
# mvn help:describe -DgroupId=org.somewhere -DartifactId=some-plugin -Dversion=0.0.0you could also use the output parameter to redirect output to a file. Refer to Configuring Describe Goal for more information about its configuration.
-
The help:effective-pom Goal
The effective-pom goal is used to make visible the POM that results from the application of interpolation, inheritance and active profiles.
It provides a useful way of removing the guesswork about just what ends up in the POM that Maven uses to build your project.
It will iterate over all projects in the current build session, printing the effective POM for each.
You can execute this goal using the following command:
# mvn help:effective-pomyou could also use the output parameter to redirect output to a file. -
The help:effective-settings Goal
The effective-settings goal is used to view the settings that Maven actually uses to run the build.
These settings are a result of merging the global file with the user’s file, with the user’s file taking precedence.
You can execute this goal using the following command:
# mvn help:effective-settingsyou could also use the output parameter to redirect output to a file. -
The help:system Goal
The system goal is used to view the system information like system properties and environment variables.
You can execute this goal using the following command:
# mvn help:systemyou could also use the output parameter to redirect output to a file. -
The help:evaluate Goal
You could use this interactive goal to evaluate some Maven expressions. To do it, just call the
help:evaluategoal:# mvn help:evaluate -Dartifact=org.apache.maven.plugins:maven-help-plugin ... [INFO] [help:evaluate] [INFO] Enter the Maven expression i.e. ${project.groupId} or 0 to exit?: ${project.artifactId} [INFO] maven-help-plugin [INFO] Enter the Maven expression i.e. ${project.groupId} or 0 to exit?: ${project.none} [INFO] null object or invalid expression ...The artifact parameter refers to ask expressions on the artifact POM. If omitted, the evaluate goal uses the current pom.
You could ask for all Maven expressions listed in the Javadoc of the PluginParameterExpressionEvaluator class.
5.9. Maven Dependency Plugin
The dependency plugin provides the capability to manipulate artifacts. It can copy and/or unpack artifacts from local or remote repositories to a specified location.[19]
The Dependency plugin has several goals:
-
dependency:analyzeanalyzes the dependencies of this project and determines which are: used and declared; used and undeclared; unused and declared. -
dependency:analyze-dep-mgtanalyzes your projects dependencies and lists mismatches between resolved dependencies and those listed in yourdependencyManagementsection. -
dependency:analyze-onlyis the same as analyze, but is meant to be bound in a pom. It does not fork the build and execute test-compile. -
dependency:analyze-reportanalyzes the dependencies of this project and produces a report that summarises which are: used and declared; used and undeclared; unused and declared. -
dependency:analyze-duplicateanalyzes the<dependencies/>and<dependencyManagement/>tags in thepom.xmland determines the duplicate declared dependencies. -
dependency:build-classpathtells Maven to output the path of the dependencies from the local repository in a classpath format to be used injava -cp. The classpath file may also be attached and installed/deployed along with the main artifact. -
dependency:copytakes a list of artifacts defined in the plugin configuration section and copies them to a specified location, renaming them or stripping the version if desired. This goal can resolve the artifacts from remote repositories if they don’t exist in either the local repository or the reactor. -
dependency:copy-dependenciestakes the list of project direct dependencies and optionally transitive dependencies and copies them to a specified location, stripping the version if desired. This goal can also be run from the command line. -
dependency:display-ancestorsdisplays all ancestor POMs of the project. This may be useful in a continuous integration system where you want to know all parent poms of the project. This goal can also be run from the command line. -
dependency:getresolves a single artifact, eventually transitively, from a specified remote repository. -
dependency:go-offlinetells Maven to resolve everything this project is dependent on (dependencies, plugins, reports) in preparation for going offline. -
dependency:listalias for resolve that lists the dependencies for this project. -
dependency:list-classesdisplays the fully package-qualified names of all classes found in a specified artifact. -
dependency:list-repositoriescollect all project dependencies and then lists the repositories used by the build and by the transitive dependencies. -
dependency:propertiesset a property for each project dependency containing the to the artifact on the file system. -
dependency:purge-local-repositorytells Maven to clear dependency artifact files out of the local repository, and optionally re-resolve them. -
dependency:resolvetells Maven to resolve all dependencies and displays the version. JAVA 9 NOTE: will display the module name when running with Java 9. -
dependency:resolve-pluginstells Maven to resolve plugins and their dependencies. -
dependency:sourcestells Maven to resolve all dependencies and their source attachments, and displays the version. -
dependency:treedisplays the dependency tree for this project. -
dependency:unpacklike copy but unpacks. -
dependency:unpack-dependencieslike copy-dependencies but unpacks.
By default, Maven only downloads the actual JAR file of each dependency, not the sources and documentation files.[20]
To download just the sources, first, we should navigate to the directory containing the pom.xml and then execute the command:
mvn dependency:sourcesIt may take a while to download the sources. Similarly, to download just the Javadocs, we can issue the command:
mvn dependency:resolve -Dclassifier=javadocOf course, we can download both of them in one command, too:
mvn dependency:sources dependency:resolve -Dclassifier=javadocObviously, if we add a new dependency after issuing these commands, we have to re-issue the commands to download sources and Javadocs for the new dependency.
5.10. Spring Boot Maven Plugin
-
Create a Spring MVC project with start.spring.io
$ curl -sS -o demo.zip "https://start.spring.io/starter.zip?type=maven-project&language=java&bootVersion=2.5.6&baseDir=demo&groupId=com.example&artifactId=demo&name=demo&description=Demo%20project%20for%20Spring%20Boot&packageName=com.example.demo&packaging=jar&javaVersion=11&dependencies=web,devtools,actuator" $ unzip demo.zip && cd demo -
Display help information on spring-boot-maven-plugin.
$ mvn spring-boot:help ... This plugin has 7 goals: spring-boot:build-image Package an application into a OCI image using a buildpack. spring-boot:build-info Generate a build-info.properties file based on the content of the current MavenProject. spring-boot:help Display help information on spring-boot-maven-plugin. Call mvn spring-boot:help -Ddetail=true -Dgoal=<goal-name> to display parameter details. spring-boot:repackage Repackage existing JAR and WAR archives so that they can be executed from the command line using java -jar. With layout=NONE can also be used simply to package a JAR with nested dependencies (and no main class, so not executable). spring-boot:run Run an application in place. spring-boot:start Start a spring application. Contrary to the run goal, this does not block and allows other goals to operate on the application. This goal is typically used in integration test scenario where the application is started before a test suite and stopped after. spring-boot:stop Stop an application that has been started by the 'start' goal. Typically invoked once a test suite has completed. ... -
Build and run Spring boot
$ mvn package
$ java -Dmanagement.endpoints.web.exposure.include=health -Dserver.port=8088 -jar target/demo-0.0.1-SNAPSHOT.jar
Open another command shell:
$ curl -i localhost:8088/actuator/health HTTP/1.1 200 Content-Type: application/vnd.spring-boot.actuator.v3+json Transfer-Encoding: chunked Date: Mon, 01 Nov 2021 10:52:48 GMT {"status":"UP"} -
Show
META-INF/MANIFEST.MFof demo-0.0.1-SNAPSHOT.jar$ jar -xf target/demo-0.0.1-SNAPSHOT.jar META-INF/MANIFEST.MF $ cat META-INF/MANIFEST.MF Manifest-Version: 1.0 Created-By: Maven Jar Plugin 3.2.0 Build-Jdk-Spec: 11 Implementation-Title: demo Implementation-Version: 0.0.1-SNAPSHOT Main-Class: org.springframework.boot.loader.JarLauncher Start-Class: com.example.demo.DemoApplication Spring-Boot-Version: 2.5.6 Spring-Boot-Classes: BOOT-INF/classes/ Spring-Boot-Lib: BOOT-INF/lib/ Spring-Boot-Classpath-Index: BOOT-INF/classpath.idx Spring-Boot-Layers-Index: BOOT-INF/layers.idx
6. Java in Container
The linux free command detects memory info from /proc/meminfo instead of /sys/fs/cgroup/memory/memory.stat, that’s the container total memory is always the same with the virtual machine host total memory.
$ free
               total        used        free      shared  buff/cache   available
Mem:         8096728     3038492      219336        3208     5155612     5058236
Swap:              0           0           0
$ docker run --rm eclipse-temurin:17 free
               total        used        free      shared  buff/cache   available
Mem:         8096728     2783748      157320        3232     5155660     4996244
Swap:              0           0           0
$ docker run --rm -m 512m eclipse-temurin:17 free
               total        used        free      shared  buff/cache   available
Mem:         8096728     2770564      170104        3208     5156060     5009280
Swap:              0           0           0
$ # For Cgroup v1, use /sys/fs/cgroup/memory/memory.limit_in_bytes, instead of /sys/fs/cgroup/memory.max
$ docker run --rm -m 512m eclipse-temurin:17 cat /sys/fs/cgroup/memory.max
536870912
$ echo $((536870912 / 1024 / 1024))m
512m|
Identify the cgroup version on Linux
The cgroup version depends on the Linux distribution being used and the default cgroup version configured on the OS. To check which cgroup version your distribution uses, run the For cgroup v2, the output is For cgroup v1, the output is |
We will use the parallel collector to demostrate the java VM container support. Unless the initial and maximum heap sizes are specified on the command line, they’re calculated based on the amount of memory on the machine. The default maximum heap size is one-fourth of the physical memory while the initial heap size is 1/64th of physical memory. The maximum amount of space allocated to the young generation is one third of the total heap size. [3]
# Run Java in virtual machine host
$ java -XX:+UseParallelGC -XshowSettings:vm -version
VM settings:
    Max. Heap Size (Estimated): 1.72G
    Using VM: OpenJDK 64-Bit Server VM

openjdk version "17.0.8" 2023-07-18
OpenJDK Runtime Environment (build 17.0.8+7-Debian-1deb12u1)
OpenJDK 64-Bit Server VM (build 17.0.8+7-Debian-1deb12u1, mixed mode, sharing)
6.1. Container detection support
The runtime UseContainerSupport option now provides automatic container detection support, which allows the VM to determine the amount of memory and number of processors that are available to a Java process running in docker containers. It uses this information to allocate system resources. This support is only available on Linux x64 platforms. If supported, the default for this flag is true, and container support is enabled by default. It can be disabled with -XX:-UseContainerSupport.
-
Use
-XX:-UseContainerSupportto disable container supportAs we can see, the default java VM maximum heap size is always same with the host, and the maximum heap size 873M is about one fourth of the physical memory 4G.
-
Run Java in container without memory limit
$ docker run --rm eclipse-temurin:17 java -XX:-UseContainerSupport -XX:+UseParallelGC -XshowSettings:vm -version VM settings: Max. Heap Size (Estimated): 1.72G Using VM: OpenJDK 64-Bit Server VM openjdk version "17.0.8" 2023-07-18 OpenJDK Runtime Environment Temurin-17.0.8+7 (build 17.0.8+7) OpenJDK 64-Bit Server VM Temurin-17.0.8+7 (build 17.0.8+7, mixed mode, sharing) -
Run Java in container with memory limit
$ docker run --rm -m 512m eclipse-temurin:17 java -XX:-UseContainerSupport -XX:+UseParallelGC -XshowSettings:vm -version
VM settings:
    Max. Heap Size (Estimated): 1.72G
    Using VM: OpenJDK 64-Bit Server VM

openjdk version "17.0.8" 2023-07-18
OpenJDK Runtime Environment Temurin-17.0.8+7 (build 17.0.8+7)
OpenJDK 64-Bit Server VM Temurin-17.0.8+7 (build 17.0.8+7, mixed mode, sharing)
-
-
Use
-XX:+UseContainerSupportto enable container supportThe default value for this flag
-XX:+UseContainerSupportis true, so we can run java without it. Now, the default maximum heap size is 114M, which is about one fourth of the memory limit 512m.-
Run Java in container with memory limit
$ docker run --rm -m 512m eclipse-temurin:17 java -XX:+UseParallelGC -XshowSettings:vm -version VM settings: Max. Heap Size (Estimated): 114.00M Using VM: OpenJDK 64-Bit Server VM openjdk version "17.0.8" 2023-07-18 OpenJDK Runtime Environment Temurin-17.0.8+7 (build 17.0.8+7) OpenJDK 64-Bit Server VM Temurin-17.0.8+7 (build 17.0.8+7, mixed mode, sharing) -
Use
-Xlog:os+container=tracefor maximum logging of container information.-
cgroup v2
$ docker run --rm -m 512m eclipse-temurin:17 java -Xlog:os+container=trace -version [0.000s][trace][os,container] OSContainer::init: Initializing Container Support [0.000s][debug][os,container] Detected optional pids controller entry in /proc/cgroups [0.001s][debug][os,container] Detected cgroups v2 unified hierarchy [0.001s][trace][os,container] Path to /cpu.max is /sys/fs/cgroup/cpu.max [0.001s][trace][os,container] Raw value for CPU quota is: max [0.001s][trace][os,container] CPU Quota is: -1 [0.001s][trace][os,container] Path to /cpu.max is /sys/fs/cgroup/cpu.max [0.001s][trace][os,container] CPU Period is: 100000 [0.001s][trace][os,container] OSContainer::active_processor_count: 4 [0.001s][trace][os,container] CgroupSubsystem::active_processor_count (cached): 4 [0.001s][trace][os,container] total physical memory: 8291049472 [0.001s][trace][os,container] Path to /memory.max is /sys/fs/cgroup/memory.max [0.001s][trace][os,container] Raw value for memory limit is: 536870912 [0.001s][trace][os,container] Memory Limit is: 536870912 [0.002s][trace][os,container] CgroupSubsystem::active_processor_count (cached): 4 [0.016s][trace][os,container] CgroupSubsystem::active_processor_count (cached): 4 [0.024s][trace][os,container] total physical memory: 8291049472 [0.025s][trace][os,container] Path to /memory.max is /sys/fs/cgroup/memory.max [0.025s][trace][os,container] Raw value for memory limit is: 536870912 [0.025s][trace][os,container] Memory Limit is: 536870912 [0.025s][trace][os,container] Path to /memory.current is /sys/fs/cgroup/memory.current [0.025s][trace][os,container] Memory Usage is: 18276352 . . . openjdk version "17.0.8" 2023-07-18 OpenJDK Runtime Environment Temurin-17.0.8+7 (build 17.0.8+7) [0.046s][trace][os,container] Path to /memory.current is /sys/fs/cgroup/memory.current OpenJDK 64-Bit Server VM Temurin-17.0.8+7 (build 17.0.8+7, mixed mode, sharing) [0.046s][trace][os,container] Memory Usage is: 19017728 -
cgroup v1
$ docker run --rm -m 512m openjdk:11 java -Xlog:os+container=trace -version
WARNING: Your kernel does not support swap limit capabilities or the cgroup is not mounted. Memory limited without swap.
[0.000s][trace][os,container] OSContainer::init: Initializing Container Support
[0.001s][trace][os,container] Path to /memory.use_hierarchy is /sys/fs/cgroup/memory/memory.use_hierarchy
[0.001s][trace][os,container] Use Hierarchy is: 1
[0.001s][trace][os,container] Path to /memory.limit_in_bytes is /sys/fs/cgroup/memory/memory.limit_in_bytes
[0.001s][trace][os,container] Memory Limit is: 536870912
[0.001s][info ][os,container] Memory Limit is: 536870912
[0.001s][trace][os,container] Path to /cpu.cfs_quota_us is /sys/fs/cgroup/cpu,cpuacct/cpu.cfs_quota_us
[0.001s][trace][os,container] CPU Quota is: -1
[0.001s][trace][os,container] Path to /cpu.cfs_period_us is /sys/fs/cgroup/cpu,cpuacct/cpu.cfs_period_us
[0.001s][trace][os,container] CPU Period is: 100000
[0.001s][trace][os,container] Path to /cpu.shares is /sys/fs/cgroup/cpu,cpuacct/cpu.shares
[0.001s][trace][os,container] CPU Shares is: 1024
[0.001s][trace][os,container] OSContainer::active_processor_count: 2
[0.001s][trace][os,container] OSContainer::active_processor_count (cached): 2
[0.003s][trace][os,container] OSContainer::active_processor_count (cached): 2
[0.039s][trace][os,container] Path to /cpu.cfs_quota_us is /sys/fs/cgroup/cpu,cpuacct/cpu.cfs_quota_us
[0.040s][trace][os,container] CPU Quota is: -1
[0.040s][trace][os,container] Path to /cpu.cfs_period_us is /sys/fs/cgroup/cpu,cpuacct/cpu.cfs_period_us
[0.040s][trace][os,container] CPU Period is: 100000
[0.040s][trace][os,container] Path to /cpu.shares is /sys/fs/cgroup/cpu,cpuacct/cpu.shares
[0.041s][trace][os,container] CPU Shares is: 1024
[0.041s][trace][os,container] OSContainer::active_processor_count: 2
[0.063s][trace][os,container] Path to /memory.limit_in_bytes is /sys/fs/cgroup/memory/memory.limit_in_bytes
[0.064s][trace][os,container] Memory Limit is: 536870912
[0.064s][trace][os,container] Path to /memory.usage_in_bytes is /sys/fs/cgroup/memory/memory.usage_in_bytes
[0.065s][trace][os,container] Memory Usage is: 10055680
. . .
openjdk version "11.0.13" 2021-10-19
OpenJDK Runtime Environment 18.9 (build 11.0.13+8)
OpenJDK 64-Bit Server VM 18.9 (build 11.0.13+8, mixed mode, sharing)
-
-
6.2. Spring Boot in Kubernetes
-
Create Spring MVC project with start.spring.io
Use start.spring.io to create a "web" project. In the "Dependencies" dialog search for and add the "web", "devtools", and "actuator" dependencies as shown in the screenshot, and select "Project" as "Maven", "Packaging" as "Jar", "Java" as "17".
Hit the "Generate" button, download the zip, and unpack it into a folder on your computer.
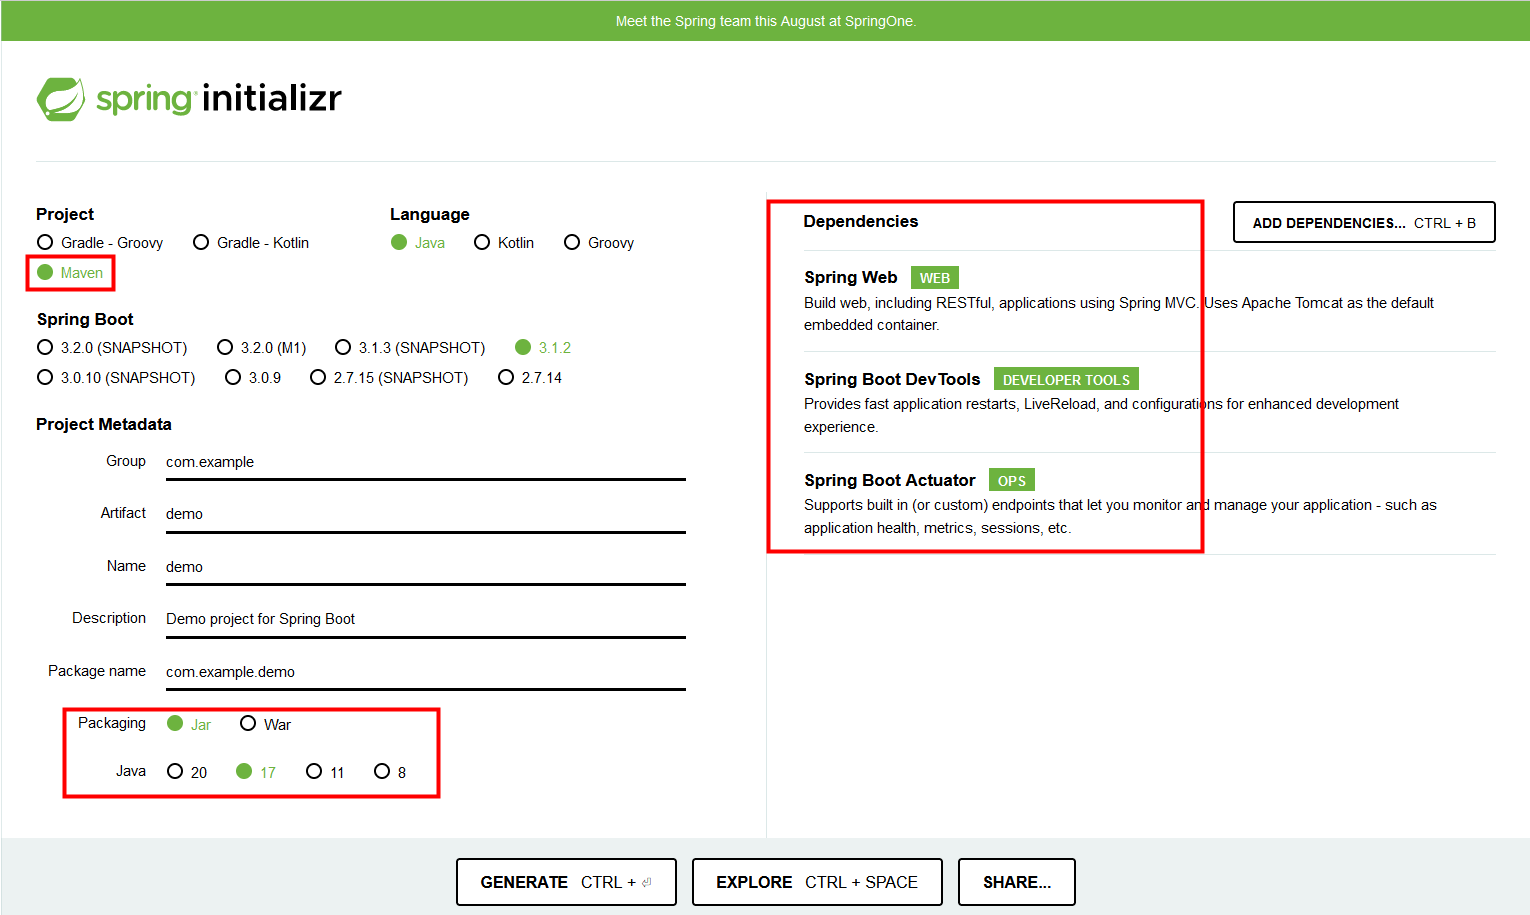
-
Build OCI image with
Dockerfile# Dockerfile FROM eclipse-temurin:17 WORKDIR /app COPY ./target/*.jar /app/app.jar CMD ["java", "-jar", "/app/app.jar"]$ mvn package && docker build . -t demo:0.0.1-SNAPSHOT [INFO] Scanning for projects... . . . [INFO] ------------------------------------------------------------------------ [INFO] BUILD SUCCESS [INFO] ------------------------------------------------------------------------ [INFO] Total time: 6.251 s [INFO] Finished at: 2023-08-24T19:17:59+08:00 [INFO] ------------------------------------------------------------------------ [+] Building 1.0s (8/8) FINISHED docker:default => [internal] load build definition from Dockerfile 0.0s => => transferring dockerfile: 157B 0.0s => [internal] load .dockerignore 0.0s => => transferring context: 2B 0.0s => [internal] load metadata for docker.io/library/eclipse-temurin:17 0.9s => [1/3] FROM docker.io/library/eclipse-temurin:17@sha256:80c017af9fdd791 0.0s => => resolve docker.io/library/eclipse-temurin:17@sha256:80c017af9fdd791 0.0s => [internal] load build context 0.0s => => transferring context: 80B 0.0s => CACHED [2/3] WORKDIR /app 0.0s => CACHED [3/3] COPY ./target/*.jar /app/app.jar 0.0s => exporting to image 0.0s => => exporting layers 0.0s => => exporting manifest sha256:e4a012ec0d765e96c790f0d38013b5921ed06ba71 0.0s => => exporting config sha256:fca9cba8c7dda76c92f2165b135af18e0059ea8f2db 0.0s => => exporting attestation manifest sha256:1230a2e4c5f1f369ee7ee1e57d5a3 0.0s => => exporting manifest list sha256:3d33699c48a6990ffe8cbc2cecc868508ca3 0.0s => => naming to docker.io/library/demo:0.0.1-SNAPSHOT 0.0s => => unpacking to docker.io/library/demo:0.0.1-SNAPSHOT 0.0s$ docker run --rm --name demo -^Cp 8088:8080 demo:0.0.1-SNAPSHOT $ docker ps CONTAINER ID IMAGE COMMAND CREATED STATUS PORTS NAMES 3c25db97db8b demo:0.0.1-SNAPSHOT "/__cacert_entrypoin…" 21 seconds ago Up 19 seconds 0.0.0.0:8088->8080/tcp, :::8088->8080/tcp demo $ curl -iI localhost:8088/actuator/health HTTP/1.1 200 Content-Type: application/vnd.spring-boot.actuator.v3+json Transfer-Encoding: chunked Date: Thu, 24 Aug 2023 11:11:37 GMT $ docker stop demo demo -
Build OCI image with multiple layers with layertools
To make it easier to create optimized Docker images, Spring Boot supports adding a layer index file to the jar. It provides a list of layers and the parts of the jar that should be contained within them. The list of layers in the index is ordered based on the order in which the layers should be added to the Docker/OCI image. Out-of-the-box, the following layers are supported: [15]
-
dependencies (for regular released dependencies)
-
spring-boot-loader (for everything under org/springframework/boot/loader)
-
snapshot-dependencies (for snapshot dependencies)
-
application (for application classes and resources)
$ java -Djarmode=layertools \
> -jar target/demo-0.0.1-SNAPSHOT.jar extract --destination layers

$ tree -L 3 layers/
layers/
├── application
│   ├── BOOT-INF
│   │   ├── classes
│   │   ├── classpath.idx
│   │   └── layers.idx
│   └── META-INF
│       ├── MANIFEST.MF
│       └── maven
├── dependencies
│   └── BOOT-INF
│       └── lib
├── snapshot-dependencies
└── spring-boot-loader
    └── org
        └── springframework
This layering is designed to separate code based on how likely it is to change between application builds. Library code is less likely to change between builds, so it is placed in its own layers to allow tooling to re-use the layers from cache. Application code is more likely to change between builds so it is isolated in a separate layer.
# Dockerfile.layers
FROM eclipse-temurin:17 as builder
WORKDIR /build
COPY target/*.jar build.jar
RUN java -Djarmode=layertools -jar build.jar extract

FROM eclipse-temurin:17
WORKDIR /app
COPY --from=builder /build/dependencies/ ./
COPY --from=builder /build/spring-boot-loader/ ./
COPY --from=builder /build/snapshot-dependencies/ ./
COPY --from=builder /build/application/ ./

CMD ["java", "org.springframework.boot.loader.JarLauncher"]
$ docker build . --no-cache -t demo:0.0.2-SNAPSHOT -f Dockerfile.layers [+] Building 3.0s (13/13) FINISHED docker:default => [internal] load build definition from Dockerfile.layers 0.0s => => transferring dockerfile: 472B 0.0s => [internal] load .dockerignore 0.0s => => transferring context: 2B 0.0s => [internal] load metadata for docker.io/library/eclipse-temurin:17 0.9s => [builder 1/4] FROM docker.io/library/eclipse-temurin:17@sha256:80c017a 0.0s => => resolve docker.io/library/eclipse-temurin:17@sha256:80c017af9fdd791 0.0s => [internal] load build context 0.0s => => transferring context: 80B 0.0s => CACHED [builder 2/4] WORKDIR /build 0.0s => [builder 3/4] COPY target/*.jar build.jar 0.1s => [builder 4/4] RUN java -Djarmode=layertools -jar build.jar extract 0.7s => [stage-1 3/6] COPY --from=builder /build/dependencies/ ./ 0.1s => [stage-1 4/6] COPY --from=builder /build/spring-boot-loader/ ./ 0.0s => [stage-1 5/6] COPY --from=builder /build/snapshot-dependencies/ ./ 0.0s => [stage-1 6/6] COPY --from=builder /build/application/ ./ 0.1s => exporting to image 1.0s => => exporting layers 0.7s => => exporting manifest sha256:1a91d5a8cc8375daa315d4c5cb805abf4bcc093ad 0.0s => => exporting config sha256:2279f2bdfba548c53026f7f906bf46d596b86c3d380 0.0s => => exporting attestation manifest sha256:0d7aa2da9d689d08e3209b2ac922e 0.0s => => exporting manifest list sha256:874e4bcc01e000241869369b16107740548d 0.0s => => naming to docker.io/library/demo:0.0.2-SNAPSHOT 0.0s => => unpacking to docker.io/library/demo:0.0.2-SNAPSHOT 0.2s$ docker run --rm --name demo2 -d -p 8088:8080 demo:0.0.2-SNAPSHOT d1abf1fb78010bc1c2e5253657e3952ecb626abcac6a71c2a6752e7d8065481f $ curl -iI localhost:8088/actuator/health HTTP/1.1 200 Content-Type: application/vnd.spring-boot.actuator.v3+json Transfer-Encoding: chunked Date: Thu, 24 Aug 2023 11:25:45 GMT $ docker stop demo2 demo2 -
-
Build OCI image with Jib
Jib, a Maven plugin for building Docker and OCI images for your Java applications, developed by Google. Unlike dockerfile-maven, it does not require a Dockerfile.
Google’s Jib recognizes that Spring Boot applications are packaged as fat JARs and automatically separates the application into multiple layers: dependencies, resources, and classes. However, Jib is not directly compatible with Spring Boot’s layered JAR feature which uses
layertools.<plugins> <plugin> <groupId>com.google.cloud.tools</groupId> <artifactId>jib-maven-plugin</artifactId> <version>3.4.0</version> <configuration> <from> <image> eclipse-temurin:17@sha256:80c017af9fdd7913c7ffaffe398c1a5ca808d29befcc9a74c0f542b1b133f53c </image> </from> <to> <image>${docker.image.prefix}/${project.artifactId}</image> <tags> <tag>${project.version}</tag> </tags> </to> </configuration> </plugin> ... </plugins>mvn compile jib:buildThe
jib:buildgoal builds and pushes the image. If you would rather just build the image without pushing, you can usejib:dockerBuild. -
Build OCI image with
mvn spring-boot:build-image(paketo.io)$ mvn spring-boot:build-image [INFO] Scanning for projects... . . . [INFO] Building image 'docker.io/library/demo:0.0.1-SNAPSHOT' . . . [INFO] [creator] Paketo Buildpack for BellSoft Liberica 10.2.6 [INFO] [creator] https://github.com/paketo-buildpacks/bellsoft-liberica [INFO] [creator] Build Configuration: [INFO] [creator] $BP_JVM_JLINK_ARGS --no-man-pages --no-header-files --strip-debug --compress=1 configure custom link arguments (--output must be omitted) [INFO] [creator] $BP_JVM_JLINK_ENABLED false enables running jlink tool to generate custom JRE [INFO] [creator] $BP_JVM_TYPE JRE the JVM type - JDK or JRE [INFO] [creator] $BP_JVM_VERSION 17 the Java version [INFO] [creator] Launch Configuration: [INFO] [creator] $BPL_DEBUG_ENABLED false enables Java remote debugging support [INFO] [creator] $BPL_DEBUG_PORT 8000 configure the remote debugging port [INFO] [creator] $BPL_DEBUG_SUSPEND false configure whether to suspend execution until a debugger has attached [INFO] [creator] $BPL_HEAP_DUMP_PATH write heap dumps on error to this path [INFO] [creator] $BPL_JAVA_NMT_ENABLED true enables Java Native Memory Tracking (NMT) [INFO] [creator] $BPL_JAVA_NMT_LEVEL summary configure level of NMT, summary or detail [INFO] [creator] $BPL_JFR_ARGS configure custom Java Flight Recording (JFR) arguments [INFO] [creator] $BPL_JFR_ENABLED false enables Java Flight Recording (JFR) [INFO] [creator] $BPL_JMX_ENABLED false enables Java Management Extensions (JMX) [INFO] [creator] $BPL_JMX_PORT 5000 configure the JMX port [INFO] [creator] $BPL_JVM_HEAD_ROOM 0 the headroom in memory calculation [INFO] [creator] $BPL_JVM_LOADED_CLASS_COUNT 35% of classes the number of loaded classes in memory calculation [INFO] [creator] $BPL_JVM_THREAD_COUNT 250 the number of threads in memory calculation [INFO] [creator] $JAVA_TOOL_OPTIONS the JVM launch flags [INFO] [creator] Using Java version 17 extracted from MANIFEST.MF [INFO] [creator] BellSoft Liberica JRE 17.0.7: Contributing to layer . . . [INFO] [creator] Saving docker.io/library/demo:0.0.1-SNAPSHOT... [INFO] [creator] *** Images (702b824ba18f): [INFO] [creator] docker.io/library/demo:0.0.1-SNAPSHOT [INFO] [INFO] Successfully built image 'docker.io/library/demo:0.0.1-SNAPSHOT' . . . -
Deploy demo.app into Kubernetes
-
unable to calculate memory configuration
# demo.yaml
apiVersion: apps/v1
kind: Deployment
metadata:
  labels:
    app: demo
  name: demo
spec:
  replicas: 1
  selector:
    matchLabels:
      app: demo
  template:
    metadata:
      labels:
        app: demo
    spec:
      containers:
        - name: demo
          image: demo:0.0.1-SNAPSHOT
          resources:
            requests:
              cpu: 100m
              memory: 128Mi
            limits:
              cpu: 250m
              memory: 256Mi
$ kubectl apply -f demo.yaml deployment.apps/demo created $ kubectl get po demo-f74fb85d9-gh28w NAME READY STATUS RESTARTS AGE demo-f74fb85d9-gh28w 0/1 Error 3 (34s ago) 52s $ kubectl logs demo-f74fb85d9-gh28w Setting Active Processor Count to 2 unable to calculate memory configuration fixed memory regions require 597169K which is greater than 256M available for allocation: -XX:MaxDirectMemorySize=10M, -XX:MaxMetaspaceSize=85169K, -XX:ReservedCodeCacheSize=240M, -Xss1M * 250 threads ERROR: failed to launch: exec.d: failed to execute exec.d file at path '/layers/paketo-buildpacks_bellsoft-liberica/helper/exec.d/memory-calculator': exit status 1 -
Java VM Garbage Collection Tuning
# demo.yaml
apiVersion: apps/v1
kind: Deployment
metadata:
  labels:
    app: demo
  name: demo
spec:
  replicas: 1
  selector:
    matchLabels:
      app: demo
  template:
    metadata:
      labels:
        app: demo
    spec:
      containers:
        - name: demo
          image: demo:0.0.1-SNAPSHOT
          env:
            - name: JAVA_TOOL_OPTIONS
              value: "-XX:MaxDirectMemorySize=8M -XX:MaxMetaspaceSize=64M -XX:ReservedCodeCacheSize=16M -Xss512K"
          resources:
            requests:
              cpu: 100m
              memory: 128Mi
            limits:
              cpu: 250m
              memory: 256Mi
$ kubectl get po -l app=demo NAME READY STATUS RESTARTS AGE demo-7b848bcfd6-82lms 1/1 Running 0 25s $ kubectl logs -f demo-7b848bcfd6-82lms Setting Active Processor Count to 2 Calculated JVM Memory Configuration: -Xmx43M (Total Memory: 256M, Thread Count: 250, Loaded Class Count: 12623, Headroom: 0%) Enabling Java Native Memory Tracking Adding 128 container CA certificates to JVM truststore Spring Cloud Bindings Enabled Picked up JAVA_TOOL_OPTIONS: -XX:MaxDirectMemorySize=8M -XX:MaxMetaspaceSize=64M -XX:ReservedCodeCacheSize=16M -Xss512K -Djava.security.properties=/layers/paketo-buildpacks_bellsoft-liberica/java-security-properties/java-security.properties -XX:+ExitOnOutOfMemoryError -XX:ActiveProcessorCount=2 -Xmx43M -XX:+UnlockDiagnosticVMOptions -XX:NativeMemoryTracking=summary -XX:+PrintNMTStatistics -Dorg.springframework.cloud.bindings.boot.enable=true ... 2021-11-02 07:34:06.238 INFO 1 --- [ main] o.s.b.w.embedded.tomcat.TomcatWebServer : Tomcat started on port(s): 8080 (http) with context path '' 2021-11-02 07:34:06.432 INFO 1 --- [ main] com.example.demo.DemoApplication : Started DemoApplication in 28.591 seconds (JVM running for 32.397)$ kubectl expose deployment demo --port 8080 --type NodePort service/demo exposed $ kubectl get svc -l app=demo NAME TYPE CLUSTER-IP EXTERNAL-IP PORT(S) AGE demo NodePort 10.99.172.195 <none> 8080:30227/TCP 6s $ curl -i localhost:30227 HTTP/1.1 404 Vary: Origin Vary: Access-Control-Request-Method Vary: Access-Control-Request-Headers Content-Type: application/json Transfer-Encoding: chunked Date: Tue, 02 Nov 2021 07:42:29 GMT {"timestamp":"2021-11-02T07:42:29.133+00:00","status":404,"error":"Not Found","path":"/"} -
Liveness and Readiness Probes with Spring Boot
# demo.yaml
apiVersion: apps/v1
kind: Deployment
metadata:
  labels:
    app: demo
  name: demo
spec:
  replicas: 1
  selector:
    matchLabels:
      app: demo
  template:
    metadata:
      labels:
        app: demo
    spec:
      containers:
        - name: demo
          image: demo:0.0.1-SNAPSHOT
          env:
            - name: JAVA_TOOL_OPTIONS
              value: "-XX:MaxDirectMemorySize=8M -XX:MaxMetaspaceSize=64M -XX:ReservedCodeCacheSize=16M -Xss512K"
          args:
            - Dmanagement.endpoint.health.group.health.include=readiness,liveness
            - Dmanagement.endpoints.web.exposure.include=health
          livenessProbe:
            initialDelaySeconds: 60
            httpGet:
              path: /actuator/health/liveness
              port: 8080
          readinessProbe:
            initialDelaySeconds: 60
            httpGet:
              path: /actuator/health/readiness
              port: 8080
          resources:
            requests:
              cpu: 100m
              memory: 128Mi
            limits:
              cpu: 250m
              memory: 256Mi
$ kubectl get po -l app=demo NAME READY STATUS RESTARTS AGE demo-5f9cd9c556-mwkrx 1/1 Running 0 110s $ curl -i localhost:30227/actuator/health HTTP/1.1 200 Content-Type: application/vnd.spring-boot.actuator.v3+json Transfer-Encoding: chunked Date: Tue, 02 Nov 2021 07:48:07 GMT {"status":"UP","groups":["liveness","readiness"]}
-
7. Java programming lanuage
Java provides three types of comments: // for single-line, /* … */ for multi-line, and /** … */ for Javadoc comments.
public class Comments {
    /**
     * This is a **Javadoc comment**.
     * It is used to document the main method and can be processed by Javadoc tools.
     *
     * @param args Command-line arguments passed to the program
     */
    public static void main(String[] args) {
        // This is a single-line comment
        System.out.println("Hello, World!"); // This prints a message to the console

        /*
         * This is a multi-line comment.
         * It spans multiple lines.
         */
        System.out.println("Multi-line comment example");
    }
}
Java is a strongly typed language, which means that every variable must have a declared type.
// variables
double salary;
salary = 65_000.0;
int vacationDays = 12;

// constants
final double CM_PER_INCH = 2.54;

// var: local variable type inference
var x = 3.14; // double x = 3.14

// enumerated types: a restricted set of values
// enum Size { SMALL, MEDIUM, LARGE, EXTRA_LARGE };
Size s = Size.MEDIUM;
int // 4 bytes
short // 2 bytes
long // 8 bytes
byte // 1 bytes-
Java does not have any
unsignedversions of theint,long,short, orbytetypes. -
Long integer numbers have a suffix
Lorl(e.g.,4000000000L). -
Hexadecimal numbers have a prefix
0xor0X(e.g.,0xCAFE). -
Octal numbers have a prefix
0(e.g.,010is8)—few programmers use octal constants. -
Numbers can write in binary with a prefix
0bor0B(e.g.,0b1001is9). -
Underscores can be added to number literals, such as
1_000_000(or0b1111_0100_0010_0100_0000) to denote one million.
float  // 4 bytes
double // 8 bytes-
Numbers of type
floathave a suffixForf(e.g.,3.14F). -
Numbers of type
doublehave an optional suffixDord(e.g.,3.14,3.14D). -
An
Eoredenotes a decimal exponent (e.g.,1.729E3is the same as1729).The constants
Double.POSITIVE_INFINITY,Double.NEGATIVE_INFINITY, andDouble.NaN(as well as correspondingFloatconstants) represent these special values, but rarely used in practice.All “not a number” (
NaN) values are considered distinct.var x = Double.NaN; // NaN var isNaN = Double.isNaN(x); // true var isSame = x == Double.NaN; // falseFloating-point numbers are not suitable for financial calculations in which roundoff errors cannot be tolerated, caused by the fact that floating-point numbers are represented in the binary number system without precise representation of the fraction
1/10, or1/3.jshell> var diff = 2.0 - 1.1 // expect 0.9, but got 0.8999999999999999 diff ==> 0.8999999999999999-
If there’s precise numerical computations without roundoff errors, use the
BigDecimalclass.
-
char // 2 bytes-
In Java, the
chartype describes a code unit in the UTF-16 encoding.// Unicode literal for Latin letter 'A' (U+0041) char letterA = '\u0041'; // Unicode literal for the Chinese character '中' (U+4E2D) char chineseChar = '\u4E2D'; // Unicode literal for the smiley face '😊' (U+263A) char smileyFace = '\u263A'; // using a string to wrap surrogate pairs to represent U+1F602 (😂) String emoji = "\uD83D\uDE02"; // Surrogate pair for U+1F602 (😂)-
A code point is a code value that is associated with a character in an encoding scheme.
// code point to char
int codePoint = 65; // BMP, 'A'
char character = (char) codePoint;

int codePoint = 0x1F602; // supplementary, '😂'
char[] chars = Character.toChars(codePoint); // convert code point to surrogate pair
// char to code point char character = 'A'; // BMP int codePoint = character; // 65, implicit conversion to code point String emoji = "😂"; // supplementary character int codePoint = emoji.codePointAt(0); // get the code point at index 0-
In the Unicode standard, code points are written in hexadecimal and prefixed with
U+, such asU+0041for the code point of the Latin letterA. -
Initially, a 16-bit code could represent all characters, but as Unicode expanded, it now uses two 16-bit values (surrogate pairs) to represent characters outside the basic multilingual plane.
-
Unicode has code points that are grouped into 17 code planes.
-
The first code plane, called the basic multilingual plane, consists of the classic Unicode characters with code points
U+0000toU+FFFF. -
Sixteen additional planes, with code points
U+10000toU+10FFFF, hold the supplementary characters. -
For characters outside the BMP (i.e., those with code points above
U+FFFF), Java uses surrogate pairs.// using a string to wrap surrogate pairs to represent U+1F602 (😂) String emoji = "\uD83D\uDE02"; // Surrogate pair for U+1F602 (😂)
-
-
-
In Java, Unicode escape sequences are processed before the code is parsed.
public class Hello {
    public static void main() {
        // \u000A is a newline
        // look inside c:\users
    }
}
$ javac Hello.java Hello.java:3: error: ';' expected // \u000A is a newline ^ Hello.java:4: error: illegal Unicode escape // look inside c:\users ^ Hello.java:3: error: not a statement // \u000A is a newline ^ Hello.java:3: error: ';' expected // \u000A is a newline ^ 4 errors
-
boolean // true, falseint[] a; // or int[] a;
int[] a = new int[100]; // or var a = new int[100];
// shortcut
int[] smallPrimes = { 2, 3, 5, 7, 11, 13, };
int[] smallPrimes;
smallPrimes = new int[] { 2, 3, 5, 7, 11, 13, }; // anonymous array
int[] nums = {5, 3, 8, 1, 2};
// sort the array in ascending order
Arrays.sort(nums);
// reverse the array
for (int i = 0; i < nums.length / 2; i++) {
int temp = nums[i];
nums[i] = nums[arr.length - 1 - i];
nums[nums.length - 1 - i] = temp;
}
// Arrays.sort() cannot be used directly to sort primitive arrays in descending order.
Integer[] arr = {5, 3, 8, 1, 2};
// sort the array in reverse order
Arrays.sort(arr, Collections.reverseOrder());
// arrays of arrays: multidimensional arrays
double[][] balances;
int[][] magicSquare =
{
{16, 3, 2, 13},
{5, 10, 11, 8},
{9, 6, 7, 12},
{4, 15, 14, 1}
};
// Ragged array with Pascal's Triangle
int[][] pascal = {
{1}, // First row
{1, 1}, // Second row
{1, 2, 1} // Third row
};String greeting = "Hi\uD83D\uDE02"; // "Hi😂"-
Java strings are sequences of Unicode characters.
-
To test whether two strings are equal, use the
equalsmethod.s.equals(t) -
To test whether two strings are identical except for the upper/lowercase letter distinction, use the
equalsIgnoreCasemethod.s.equalsIgnoreCase(t) -
Do not use the
==operator to test whether two strings are equal, which only determines whether or not the strings are stored in the same location. -
Java strings are sequences of
charvalues.-
The
lengthmethod yields the number of code units required for a given string in the UTF-16 encoding.String greeting = "Hi\uD83D\uDE02"; // "Hi😂" int n = greeting.length(); // is 4 -
To get the true length—that is, the number of code points—call
int cpCount = greeting.codePointCount(0, greeting.length()); // 3 -
The call
s.charAt(n)returns the code unit at positionn, wherenis between0ands.length() – 1.char first = greeting.charAt(0) // 'H' char last = greeting.charAt(3) // '?' -
To get at the ith code point, use the statements
int index = greeting.offsetByCodePoints(0, i); int cp = greeting.codePointAt(index); int cp = greeting.codePointAt(3); // 56834 -
To turn a single code point into a string, use the
Character.toString(int)int codePoint = 0x1F37A; str = Character.toString(codePoint); -
Traverse a string to look by code points or code units
greeting.codePoints().toArray();  // int[3]  { 72, 105, 128514 } - Unicode code points
greeting.chars().toArray();       // int[4]  { 72, 105, 55357, 56834 } - UTF-16 code units
greeting.toCharArray();           // char[4] { 'H', 'i', '?', '?' } - individual char elements
-
-
The
StringBufferclass is less efficient thanStringBuilder, but it allows multiple threads to add or remove characters.// Using StringBuffer (Thread-Safe) StringBuffer stringBuffer = new StringBuffer("Hello"); stringBuffer.append(" World"); System.out.println("StringBuffer: " + stringBuffer.toString()); // Using StringBuilder (Faster, but Not Thread-Safe) StringBuilder stringBuilder = new StringBuilder("Hello"); stringBuilder.append(" World"); System.out.println("StringBuilder: " + stringBuilder.toString());
A block, or compound statement, consists of a number of Java statements, surrounded by a pair of braces, which define the scope of the variables.
public class Hello {
    public static void main() { // main block
        { // outer block
            int n;
            { // nested inner block
                int k;
                int n; // ERROR--can't redeclare n in inner block
            } // k is only defined up to here

            int k; // fine, 'k' from the inner block is no longer in scope
        } // 'n' and 'k' go out of scope here
    }
}-
if / if-else
Scanner scanner = new Scanner(System.in); int num = scanner.nextInt(); if (num > 0) { System.out.println("The number is positive."); } if (num < 0) { System.out.println("The number is negative."); } else { System.out.println("The number is zero or positive."); } -
while / do-while / for / for-each / break / continue
int count = 1;
while (count <= 3) {
    System.out.println("Count: " + count);
    count++;
}
int count = 1; do { System.out.println("Count: " + count); count++; } while (count <= 3);for (int i = 1; i <= 10; i++) { System.out.println(i); }int[] numbers = {1, 2, 3, 4, 5}; // for-each loop to iterate through the array for (int num : numbers) { System.out.print(num + " "); }for (int i = 1; i <= 5; i++) { if (i == 3) break; // break the loop when i is 3 System.out.println("i = " + i); }// break with label outerLoop: for (int i = 1; i <= 3; i++) { for (int j = 1; j <= 3; j++) { if (i == 2 && j == 2) break outerLoop; // break the outer loop System.out.println("i = " + i + ", j = " + j); } } // i = 1, j = 1 // i = 1, j = 2 // i = 1, j = 3 // i = 2, j = 1for (int i = 1; i <= 5; i++) { if (i == 3) continue; // skip when i is 3 System.out.println("i = " + i); } -
switch
A
caselabel can be-
A constant expression of type
char,byte,short, orint -
An enumerated constant
-
A
stringliteral -
More than one of these, separated by commas
switch (day) {
    case 1, 7: // weekend
        System.out.println("weekend!");
        break;
    case 2, 3, 4, 5, 6: // weekdays
        System.out.println("weekday.");
        break;
    default:
        System.out.println("invalid day.");
}
String dayType = switch (day) { case 1, 7 -> "weekend!"; default -> { System.out.println("work and work!"); yield "weekday."; } };enum Day { MONDAY, TUESDAY, WEDNESDAY, THURSDAY, FRIDAY, SATURDAY, SUNDAY } Day today = Day.SATURDAY; String dayType = switch (today) { case SATURDAY, SUNDAY -> "weekend!"; default -> "weekday."; } -
References
-
[1] https://docs.oracle.com/en/java/javase/17/docs/specs/man/index.html
-
[2] https://docs.oracle.com/en/java/javase/17/docs/specs/man/java.html
-
[3] https://docs.oracle.com/en/java/javase/17/gctuning/parallel-collector1.html
-
[6] https://maven.apache.org/guides/introduction/introduction-to-the-pom.html
-
[9] https://maven.apache.org/guides/mini/guide-configuring-plugins.html
-
[11] https://maven.apache.org/plugins/maven-dependency-plugin/usage.html
-
[12] https://maven.apache.org/guides/plugin/guide-java-plugin-development.html
-
[13] https://maven.apache.org/plugins/maven-help-plugin/usage.html
-
[14] https://maven.apache.org/guides/introduction/introduction-to-the-lifecycle.html
-
[15] https://docs.spring.io/spring-boot/docs/2.5.x/reference/htmlsingle/#features.container-images.layering
-
[18] https://kubernetes.io/docs/concepts/architecture/cgroups/
-
[19] https://maven.apache.org/plugins/maven-dependency-plugin/
-
[20] https://www.baeldung.com/maven-download-sources-javadoc
-
[21] https://maven.apache.org/guides/introduction/introduction-to-dependency-mechanism.html